Building concrete relationships with customers is one of the most desired outcomes for any business. While loyalty, communication, and of course, stellar services contribute immensely to each stage of building meaningful customer relationships, modern businesses are steering towards cutting-edge tools and technologies such as cloud, AI, and advanced analytics to nurture these relationships and fuel organic business growth.
Salesforce is one such customer relationship management (CRM) tool that equips you to connect with partners, customers, and prospects and collate relevant data to derive meaningful insights into their unique needs. With Salesforce, businesses can track customers, gather data, manage customer support, and even cater to complaints. Moreover, businesses can also deploy Salesforce to generate reports, track contacts, and create social media engagement.
Like most CRM tools, Salesforce provides a wide variety of applications that businesses can use in silos, but the best outcomes are achieved when these applications are used in close conjunction. To do so, you need to integrate Salesforce applications with tools such as Microsoft Azure Data Factory (ADF) that can help you get a big picture view of what your customers need and use that information to make strategic business decisions.
Our tool of choice to integrate Salesforce applications is Microsoft Azure. It is, in essence, a cloud ETL service that is highly flexible and enterprise-ready. Businesses employ Azure cloud platforms to create, manage, and deploy applications across massive networks with the tools of their choice.
Here is a step-by-step breakdown of how you can configure and connect Salesforce applications with ADF:
Configuration in Salesforce –
- Log in to Salesforce with the administrator account.
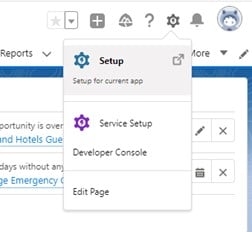
- Go to Setup option as shown in the image below.
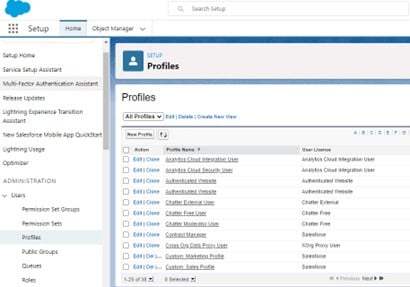
- From left side panel, under administrator go to Profiles as shown below.
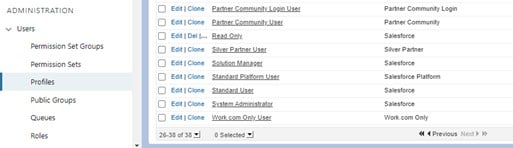
- Click on System Administrator from the list.
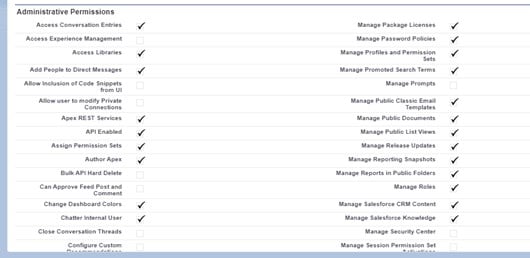
- Scroll down till administrative permissions and check the API enabled check box. If already checked, then leave as is.
- Go to profile settings to create a secured token on Salesforce to connect to Azure Data Factory.
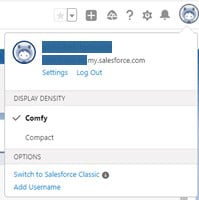
- Click on Reset my security token.
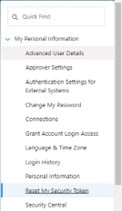
This step will send the security token through the email.
Create a linked service in Azure Data Factory
- Go to Azure Data Factory and create a dataset as shown below.
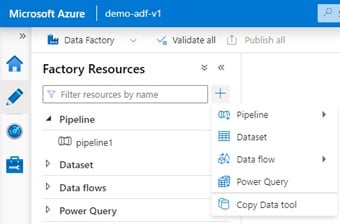
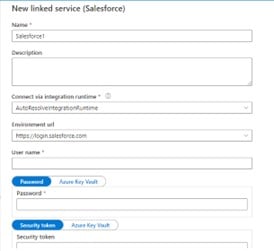
- Search and click on Salesforce to create a linked service.
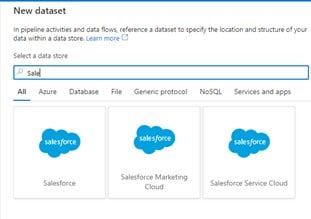
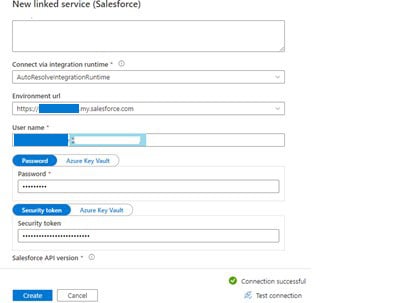
- Provide all the details to configure the Salesforce connection.
- The following screenshot shows the configuration and the successful connection with Salesforce from Azure Data Factory.
Steps to read data from Salesforce table
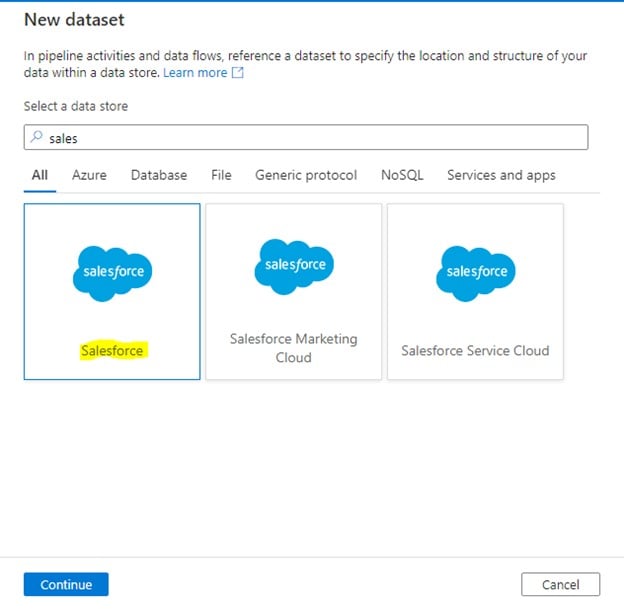
- Click on Create new dataset, select Salesforce from the options, and click on Continue.
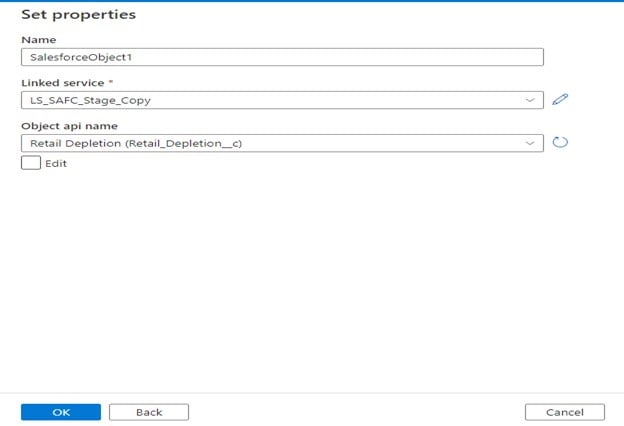
- Select Linked Service which is already created above, select the object from which data needs to be read and click on OK.
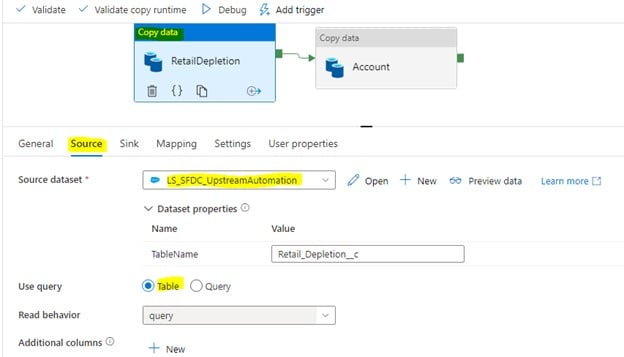
- Now create a pipeline, drag copy activity, click on Source, and select the dataset which has been created in the previous step.
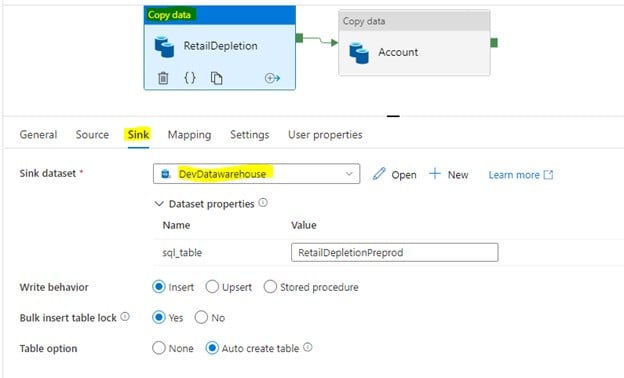
- Configure Sink as shown below and click on Debug. It will load data from Salesforce to SQL table.
Inserting data into Salesforce object:
Scenario: Load data from SQL table to Salesforce object
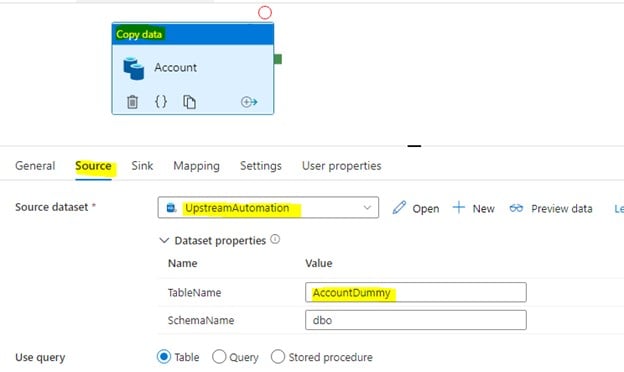
Create a new pipeline, drag copy activity, and configure Source as shown below.
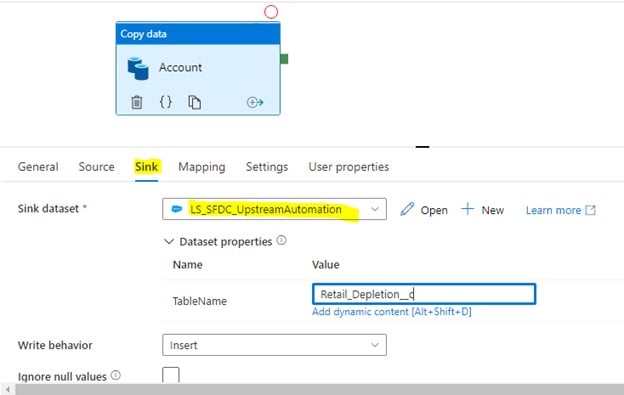
Configure Salesforce object as a sink, as shown below.
Provide mapping and click on debug, it will load data from SQL table to Salesforce.
In case data needs to be inserted for new rows and updated in case of existing rows, then select Upsert option as shown below, and provide a column under “External ID Field”, this column should be marked as External ID in Salesforce object (unique key column).
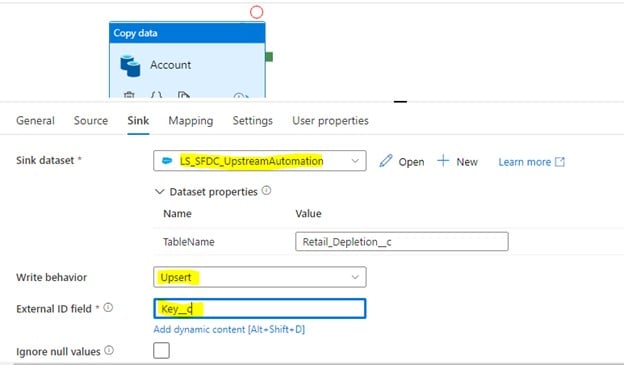
It will compare source and target records based on this External ID column and will insert, update accordingly.
With this, you have effectively set up your Salesforce data with the help of ADF.
But before I conclude, let me pen down a few benefits of conducting this integration.
- Easy tracking- With Salesforce integration, you can easily track leads and migrate data across various platforms in a hassle-free manner.
- Better insights- Salesforce integration equips you with relevant data and insights about your customers’ browsing behaviors with the help of their purchase history.
- Improved analytics- After completing Salesforce integration, you can easily analyze the effectiveness of your unique business initiatives and avail insights into why certain services aren’t working as well as expected.
- Centralized data- With Salesforce integration, you can maintain all your stakeholder information in one place and eliminate the need to constantly update separate systems in response to organizational changes.
Overall, completing a Salesforce integration with the help of Azure Data Factory is a superb way to analyze your customers and your partners and get insights into your customers’ needs.
Write to us to learn more about big data and cloud computing services at Nitor Infotech. Additionally take a look at our blog that sheds light on how you can deploy an existing ADF branch on a new ADF environment using Git configuration.


