Imagine a scenario wherein you are making drastic changes in your existing data factory. This could be by changing naming conventions or handing over your development resources to a new customer. There are several instances where you may need to create a new data factory. This may be to develop in, or at least revise the source of your existing data factory and bring in a new repo.
All of this, and then some, can be done with the help of Azure Data Factory’s Git configuration. With it, you can readily manage the contents of your existing data factory with no hassle at all.
In my blog, I will show you how you can deploy an existing data factory repository brand on a new environment with the help of this Git configuration.
But, before I begin, I want to shed light on a prerequisite that will help you with this migration. You must create environment-specific resources (such as Global Parameter, Private End Point, Integration Runtime) on the new Data Factory environment. This is so that when we point it to our branch, the existing manually created resources will be published automatically to the branch.
An added benefit of this is that it resolves the error “Pipeline is not found, please publish first.”
Now, without further ado, here is how you do it.
1. Consider the branch “release” to be deployed on Azure Data Factory through Git Configuration. This branch will not have “factory” and “managedVirtualNetwork” folders. This is because these will be created manually on the new environment and automatically in this branch once pointed to the new Data Factory environment.

Fig 1: The branch “release” to be deployed on Azure Data Factory through Git Configuration
2. Go to Data Factory environment and Open Git Configuration (Manage -> Git Configuration).
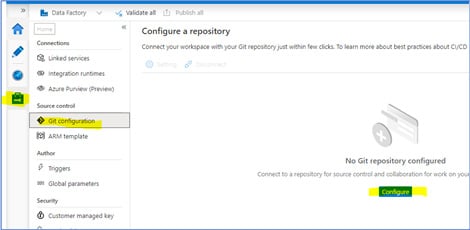
Fig 2: Open Git Configuration
3. Click on Configure and follow the steps as shown below.
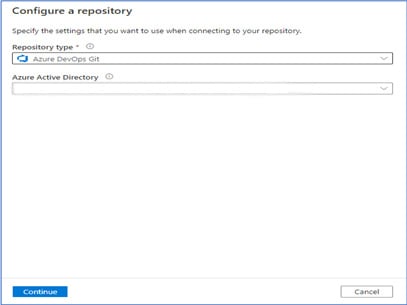
Fig 3: Configure a repository
4. Set the “release” branch as Collaboration branch. Tick the “Import existing resources to repository” option as given below. Then click on Apply.
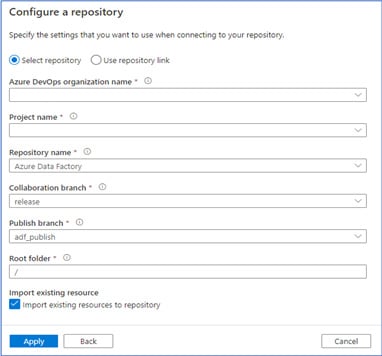
Fig 4: Configure a repository
5. After clicking on Apply, the already existing resources will be added/published in the “release” branch. We had created these manually on Data Factory before connecting it to the “release” branch.
This happened because we checked the “Import existing resources to repository” option during Git configuration.
So, we will get two new folders in the release branch as shown below:
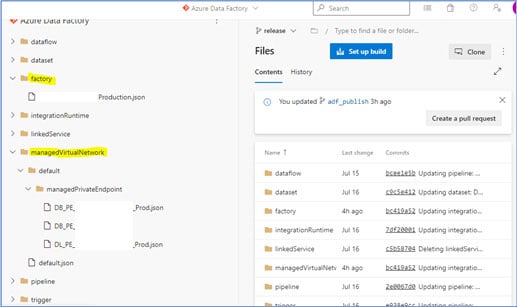
Fig 5: Two new folders in the release branch
6. Now go to Azure DevOps and create a local branch from the “release” branch with any name. This new local branch is for temporary use.
In our case, we named it as “ProdRepo”.
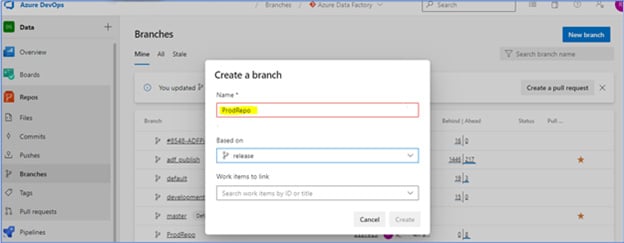
Fig 6: Create a local branch
7. The “ProdRepo” branch will be a replica of the “release” branch as shown below:
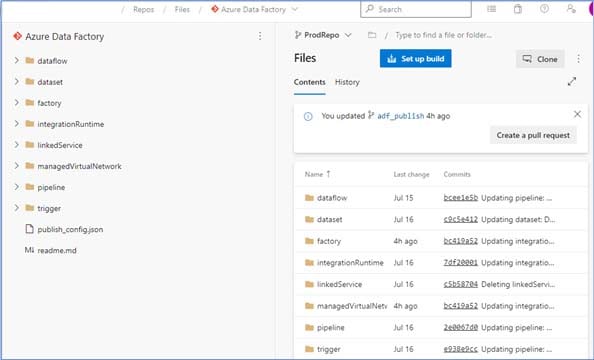
Fig 7: The “ProdRepo” branch – a replica of the “release” branch
8. Now go to Data Factory and disconnect the existing branch “release” from Data Factory.
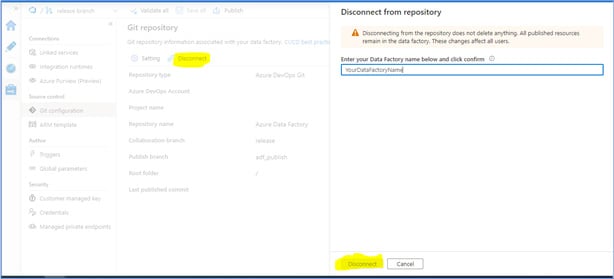
Fig 8: Disconnect the existing branch “release” from Data Factory
9. Follow steps 2 to 4 as mentioned above. The exception is that you need to uncheck the “Import existing resources to repository” option and set the Collaboration branch as “ProdRepo”.
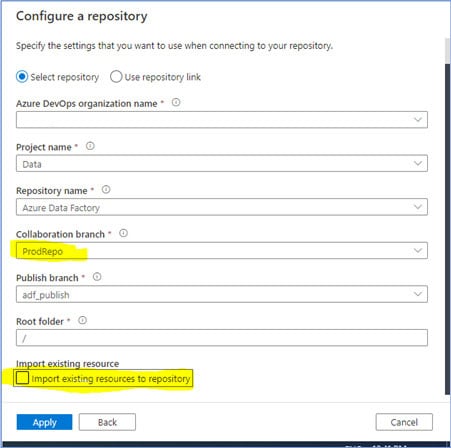
Fig 9: Set the Collaboration branch as “ProdRepo”
10. After Clicking on Apply, your Data Factory will point to the new temporary branch i.e., “ProdRepo”.
Then Click on Publish to deploy the branch on the Data Factory.
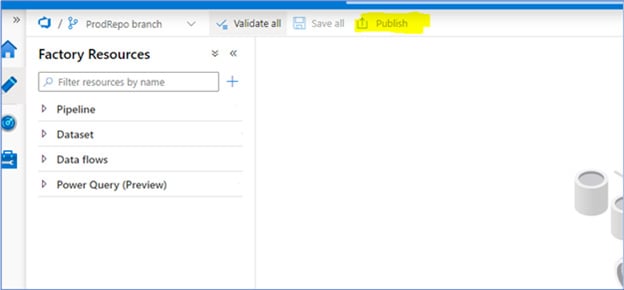
Fig 10: Publish to deploy the branch on the Data Factory
- As we know, the “adf_publish” branch is by default a publish branch in ADF and here we have the “ProdRepo” branch as a Collaboration Branch.
- Azure wants to get deployed everything on the adf_publish branch from Collaboration Branch “ProdRepo”. This is so that Data Factory can run independently even without pointing to any Collaboration branch.
- After publishing now, we can still see all the pipelines, datasets, linked services, and other resources on ADF. This is even if we disconnect the Collaboration branch (through Git Configuration of data Factory),
- This is because everything has been published on adf_branch now and does not need a Collaboration_Branch anymore i.e., ProdRepo.
- Publishing everything helps you to resolve the error – “Pipeline is not found, please publish first.”
11. After successfully Publishing, now we can disconnect (as shown in Step No. 8) the “ProdRepo” Collaboration branch. We can again point the “release” Collaboration branch (as shown in Steps 2, 3 and 4). This is except for unchecking the “Import existing resources to repository”.
And there you have it! You are now equipped to move your existing data factory repositories to new ones using the Git configuration as arsenal.
Write to us at Nitor Infotech. Learn more about how you can manage copious amounts of data with our data engineering services.


