
Manually extracting data can feel like searching for a needle in a haystack, in a world flooded with documents. Businesses dealing with invoices, contracts, healthcare records, or substantial data often encounter familiar challenges like inefficiencies, errors, and delays. However, the rise of artificial intelligence has brought a much-needed solution that has evolved. With three versions released so far, this solution is none other than the go-to tool for automated document processing—LayoutLM.
LayoutLM is a cutting-edge language model developed by Microsoft designed to understand both the content and structure of documents. It offers a scalable, automated solution to:
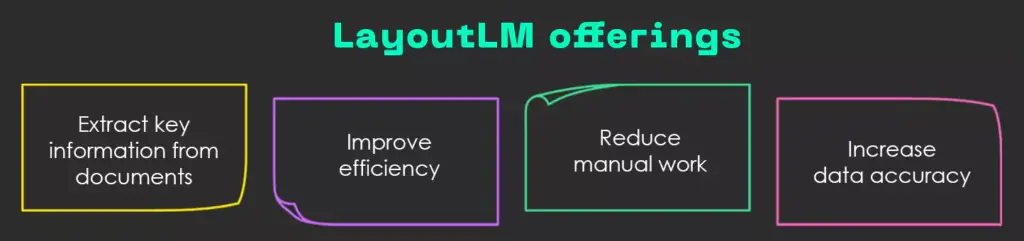
Fig: LayoutLM offerings
So, in this blog, you’ll gain a clear understanding of the LayoutLM language model. We’ll dive into the workflow of LayoutLMv3, the latest release, and provide a comparative analysis to help you choose the right text extraction tool. Finally, I’ll guide you through the steps required for effective text extraction.
Let’s get cracking!
What is the LayoutLMv3 Model and How Does it Work?
To give you some context, the LayoutLM model is built on the transformers framework and has evolved through three different versions since its launch in 2019: LayoutLMv1, LayoutLMv2, and the latest, LayoutLMv3. As mentioned above, I’ll focus on using LayoutLMv3 for now.
LayoutLMv3 is a multi-modal approach for processing text, layout, and images together. It is the best version because it delivers superior accuracy and efficiency in handling complex documents by integrating both textual and visual information.
The diagram below illustrates how LayoutLMv3 helps with text extraction:
Here’s a breakdown of the above diagram:
- Input image/document: The process starts with an image or document, like a scanned PDF or a photo of a page.
- Conversion to RGB: Next, the input is changed to RGB format, making it easier for the model to process.
- Encoding and feature extraction: The model then analyzes the image to identify and extract important text and layout features.
- Tokenization: Further, the extracted text is divided into smaller units called tokens, helping the model understand the content better.
- Extracted text: The final output is the extracted text in a structured format, ready for further use or analysis.
You might be wondering why you should choose LayoutLMv3 over other options. Well, the next section should answer this clearly.
Keep reading!
Why Should You Choose LayoutLMv3?
Here are the main reasons that make LayoutLMv3 for text extraction relevant in 2025:
- Open source and cost-effective: LayoutLMv3 is an open-source model, available for free, unlike paid services such as Amazon Textract and Microsoft Azure Form Recognizer.
- Advanced document processing: It excels in processing both text and images, handling a variety of document formats like PDFs and scanned images, and ensuring accurate extraction from structured and unstructured documents.
- Versatility across tasks: Whether it’s analyzing text or handling image-centric tasks like document classification and layout analysis, LayoutLMv3 offers a flexible solution for various document types.

Learn how we helped a company to gain financial visibility with a tailored solution for QuickBooks insights, built on Microsoft Azure.
Still confused? Refer to this insightful comparison to select the right text extraction tool for your project:
| Feature | LayoutLMv3 | Amazon Textract | Microsoft Azure Form Recognizer |
|---|---|---|---|
| Data Privacy | Complete control over data (self-hosted) | Requires data upload to AWS cloud | Requires data upload to Azure cloud |
| Setup and Deployment | Requires technical expertise to implement and host | Easy setup with AWS cloud infrastructure | Easy setup with Azure cloud infrastructure |
| Integration Capabilities | Customizable for any workflow | Seamless integration with AWS services | Seamless integration with Azure ecosystem |
| Multi-modal Processing | Yes, combines text, layout, and image data for accuracy | Limited to text and structured fields | Limited to text and structured fields |
| Supported Document Types | PDFs, scanned images, forms, and unstructured layouts | Structured documents (forms, tables, invoices) | Structured documents (forms, tables, invoices) |
| Support for Handwritten Text | Limited, struggles with handwritten text | Yes, supports handwritten text extraction | Yes, supports handwritten text extraction |
| Ease of Use | Requires ML expertise for setup | User-friendly APIs with minimal configuration | User-friendly APIs with minimal configuration |
| Customizability | Highly customizable with fine-tuning | Limited to pre-built APIs | Limited to pre-built APIs |
| Cost | Open source and free to use | For free tier: 1000 pages per month are free. For Pay-as-you-go model:
|
For Pay-as-you-go model: 500 pages free per month. 0-1M pages – $1.50 per 1,000 pages1M+ pages – $0.60 per 1,000 pagesCommitment Tiers: pay an upfront monthly fee for high-volume usage at a discount. |
Next, let me walk you through the steps for text extraction.
What are the Steps for Text Extraction using the LayoutLMv3 Model?
Here are the 10 steps that can be followed for text extraction using the LayoutLMv3 model:
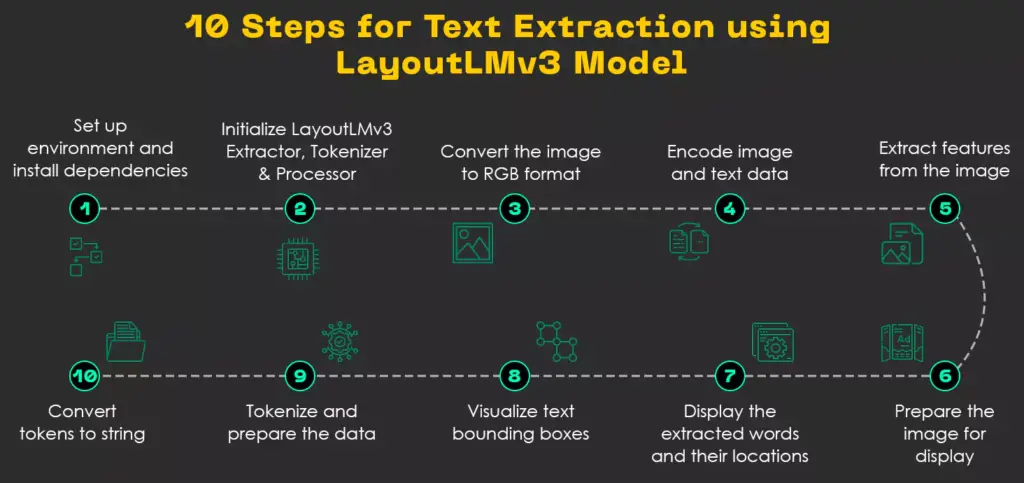
Fig: 10 Steps for Text Extraction using LayoutLMv3 Model
Step 1: Set up the environment and install dependencies
The first thing you can do to set up the environment is to use Google Colab for this setup, as it provides a robust, cloud-based environment that simplifies the process of running machine learning models. One of the key advantages of Colab is that it comes with pre-installed Python libraries. This eliminates the need for complex installations or configurations on your local machine.
Additionally, Colab offers GPU access, ensuring that you can run resource-intensive models like LayoutLMv3 efficiently and without the need for specialized hardware. This makes Colab an ideal choice, allowing you to focus on building and testing models rather than managing infrastructure or dependencies.
However, if you’re setting up the environment locally, you’ll need to ensure the following specifications:
- Operating System: It must be compatible with Windows, macOS, and Linux.
- Python Version: Install Python 3.x, as it is compatible with the required libraries for running models like LayoutLMv3.
Extra read: Compare modern Python data processing paradigms.
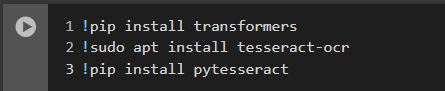
Once that is done, you need to install these dependencies:
- Install Transformers Library: First, you need to install the Transformers library, which is essential for using LayoutLMv3.
- Install Tesseract OCR Software: Tesseract is required to extract text from images.
- Install PyTesseract Library: PyTesseract is a Python wrapper for Tesseract.Here’s the code snippet that you can use to install the above:
Step 2: Initialize LayoutLMv3 Feature Extractor, Tokenizer, and Processor
To enable efficient text extraction from images, it’s crucial to initialize the relevant classes of the LayoutLMv3 model. These classes are designed to process and interpret visual content, ensuring accurate extraction of textual information.
Here are the following classes of LayoutLMv3 model, that you need to initialize:
- LayoutLMv3FeatureExtractor: This component extracts features from images, including pixel values and positional coordinates of words. It is configured with OCR functionality, allowing it to accurately recognize and extract text from images.
- LayoutLMv3TokenizerFast: This is used for tokenizing input text, loaded from the pre-trained “microsoft/layoutlmv3-base” model.
- LayoutLMv3Processor: This component combines the feature extractor and tokenizer to process input images and generate tokens for further analysis.
Here’s what the initialization looks like:

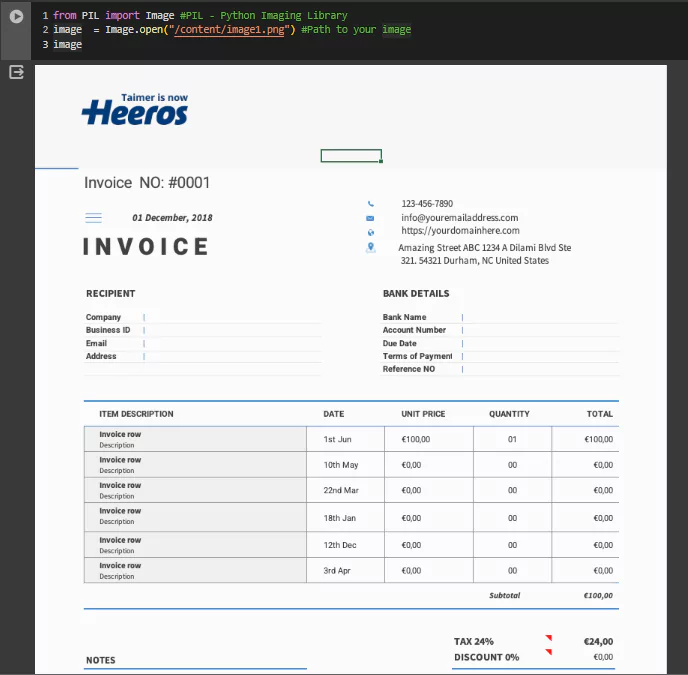
Step 3: Convert the image to RGB (red, green, and blue standard color model) format
The following code is used to convert the image into the RGB format, a widely used color model for displaying images on digital screens. This ensures the image is properly formatted for processing and visualization.
Step 4: Encode the image and text data
Encoding refers to the process of converting an image into a specific format or representation that can be understood by computers, stored, transmitted, or processed efficiently. It generates a dictionary containing keys for tokenized input, word bounding boxes, and image pixel values.
Refer to the following code that encodes the image and text data for processing:

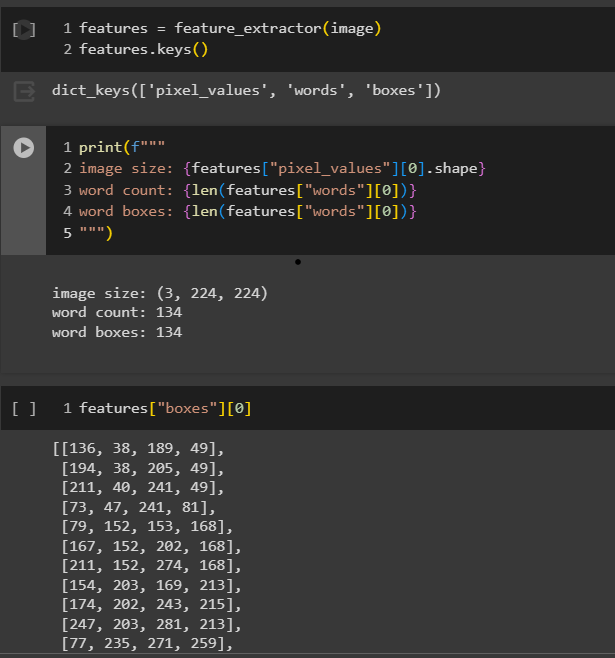
Step 5: Extract features from the image
Feature extraction is the process of identifying and selecting important or relevant information (features) from raw data, such as images or text. The feature_extractor function is applied here to the image, resulting in the extraction of features such as pixel values, word bounding boxes, and word counts.
Here’s how you can do it:
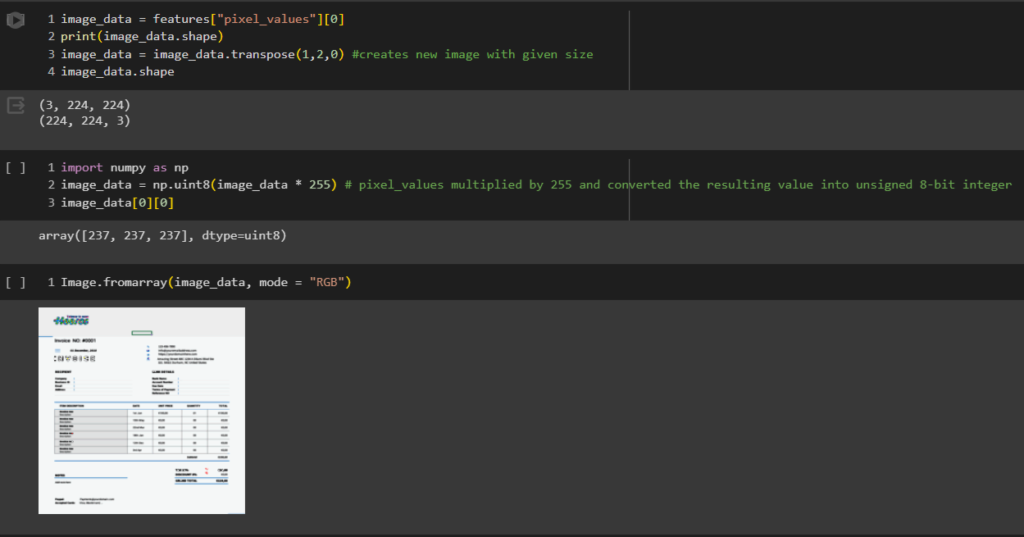
Step 6: Prepare the image for display
This process ensures that the image is properly prepared to be displayed accurately on the screen.
In this step, you must transpose the image data, which means you are reorganizing the color information—such as red, green, and blue—so that it is in the correct order. This adjustment is crucial for maintaining the integrity of the image’s color representation.
Next, modify the pixel values to adhere to a standard range (from 0 to 255). This transformation ensures that the image’s colors and finer details are displayed correctly, making the final output visually accurate and consistent across different devices.
Here’s how you can do it:
Step 7: Display extracted words and their locations
In this step, you will extract and display the first few words from the document image, along with their corresponding bounding boxes. These bounding boxes represent the coordinates of the rectangular area where each word appears in the image.
The words array contains the text recognized from the image, while the bounding_boxes array holds the specific coordinates that indicate the location of each word on the page. This allows you to visually map the extracted text back to its position within the document, providing a clearer understanding of its layout and structure.
Here’s how you can do it:

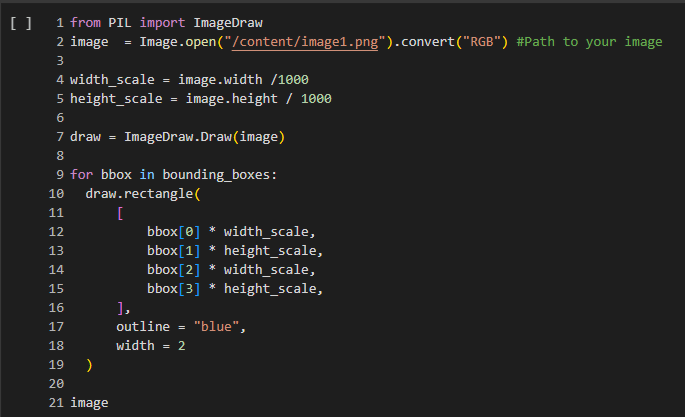
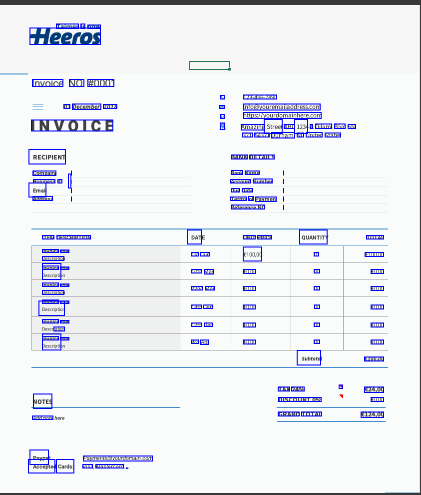
Step 8: Visualize text bounding boxes
A bounding box is a rectangle drawn around an object (text) in an image to define its position and size.
Using the provided code, you can leverage the ImageDraw module to overlay bounding boxes on the original document image. These boxes highlight the locations of the detected text, providing a clear visual confirmation of where the text has been identified within the image.
Once you implement the above-mentioned code, here’s the kind of output that you’ll receive:
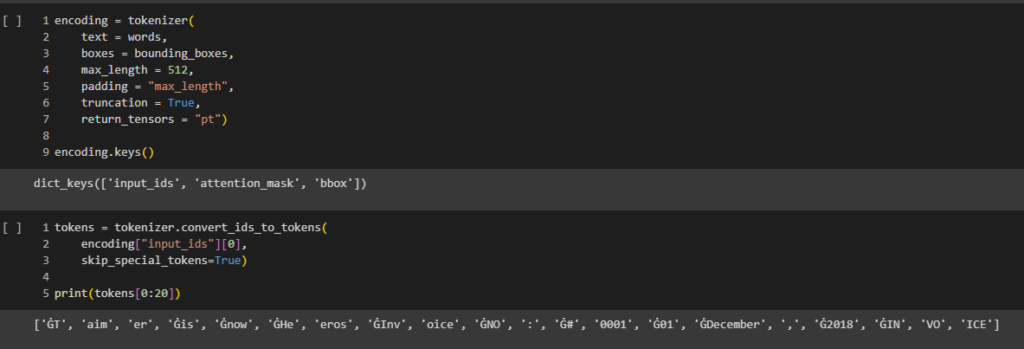
Step 9: Tokenization and data preparation
Tokenization is the process of splitting a piece of text into smaller units known as tokens. In this step, you can use the tokenizer to encode the extracted text along with its bounding boxes, effectively preparing the data for the model.
Once the encoding is complete, you will obtain the first 20 tokens, offering a glimpse into how the text is segmented and structured for the model’s interpretation. This segmentation is crucial for the model’s ability to understand and process the text effectively.
Here’s the code snippet:
Step 10: Convert the tokens to a string
Finally, you will need use the convert_tokens_to_string function of the tokenizer to transform the tokens back into a human-readable string. This conversion will ensure that the extracted text is presented in a format that is easy to understand and ready for any subsequent tasks. Thus, the data will become more accessible for further processing or analysis.
Refer to this code snippet:

That’s it! By following the above 10 steps, you’ll have successfully processed and extracted text using LayoutLMv3.
Bonus: Build a successful career in data and AI with 8 key skills.
Further, let’s look at some of the key use cases from a business perspective.
What are the Use Cases of LayoutLMv3 across Various Industries?
Refer to this table to gain insights into the key advantages the LayoutLMv3 model can offer to various industries:
| Advantage | Description | Industries/Use Cases |
|---|---|---|
| Improved operational efficiency | Automates data extraction, reduces manual effort, and speeds up decision-making. | Finance, Insurance, Healthcare |
| Accurate multi-modal data extraction | Combines text, layout, and visual features for high accuracy in complex document structures. | Legal firms, Auditing companies, and Regulatory agencies |
| End-to-end integration | Integrates OCR and layout analysis into a single workflow. This simplifies document digitization and accelerates deployments. | Retail, Logistics, and Digital Transformation projects |
| Versatility across use cases | Supports tasks like text extraction, classification, and layout analysis. | E-commerce, HR, and Education |
| Cost-effectiveness | Is open source. So, this eliminates subscription costs of proprietary solutions. | Businesses seeking scalable and cost-effective document processing |
While offering numerous benefits, it’s important to be mindful of some of the limitations, including:
- LayoutLMv3 is unable to extract text from images containing handwritten text. This limits its applicability in scenarios where handwritten content is prevalent.
- While LayoutLMv3 performs well on structured documents, it may struggle with highly complex or unconventional layouts, especially if the documents contain irregular formatting or unusual visual elements.
To address these limitations, you can integrate handwriting recognition tools like Tesseract OCR for better extraction of handwritten text and combine LayoutLMv3 with specialized models or preprocessing techniques to handle complex or unconventional layouts. By restructuring documents or enhancing the training data, you can improve the model’s adaptability to irregular formatting, ensuring broader applicability in diverse scenarios.
My point is that where there is a will, there is a way!
I highly recommend leveraging LayoutLMv3 for text extraction to harness the full potential of AI and create a significant impact.
Additionally, I invite you to reach out to us at Nitor Infotech to explore our advanced GenAI-based software development services and discover how we can collaborate to drive success.
LayoutLM is a deep learning model designed to extract and understand text from scanned documents, PDFs, and images. By incorporating both the text and the layout structure of a document, LayoutLM offers improved accuracy in extracting key information such as tables, forms, and text with complex formatting. Its ability to process the visual and textual elements together makes it a powerful tool for document understanding, significantly enhancing text extraction tasks across various industries.


