Software Engineering | 13 Sep 2023 | 15 min
Selenium Webdriver with Chrome in AWS Lambda: A Comprehensive Guide

In the fast-paced sphere of modern software development, challenges often arise that demand innovative solutions. Imagine this: You are part of a dynamic team working on a cutting-edge web application, and your project’s success hinges on the timely and reliable execution of automated UI testing. However, traditional setups are proving to be both cumbersome and expensive. This is precisely where the dynamic duo of Selenium Webdriver and Chrome, combined with the power of AWS Lambda, swoops in to save the day.
For software engineers, QA testers, and DevOps professionals alike, the synergy of Selenium Webdriver and Chrome within the AWS Lambda service opens a plethora of possibilities.
So, in this blog, I will elucidate the process of deploying a Python script that relies on Selenium test and Chrome to the AWS Lambda service. This will give an idea of how you can deploy any script (in any language supported by AWS lambda function), along with their dependencies—beyond Selenium and Chrome — on the AWS Lambda platform.
Before diving into the process, let me give you a quick background brief on when and why we found ourselves needing to embark on this endeavor.
A system needed to run a service that required users to be logged in to process requests. We, at Nitor Infotech, observed that users were automatically logged out after a certain interval (for security reasons). When this occurred, they had to manually log back into the system to keep the service operational. Evidently, this approach was suboptimal, prompting our decision to pursue automation testing as the solution.
To automate the solution for the problem, we explored several options – ranging from setting up a CRON job on an AWS EC2 instance to utilizing AWS Lambda services. After careful consideration, we determined that the most cost-effective and quickest option would be to leverage AWS Lambda services.
Onwards to the solution!
The idea was to create a Python script that would be automatically triggered at regular intervals to ensure that the user remains logged in before the session expires. The script’s purpose was to utilize headless Chromium and Chrome Driver to launch the login portal in the background. The script would then use the Selenium library to enter credentials and perform the login, keeping the user logged in.
We ensured the confidentiality of credentials by retrieving them from the AWS Secret Manager. Further, we configured this Python script to run as an AWS Lambda function and invoked it at fixed intervals using AWS Event Bridge Scheduler.
Additionally, to ensure everything proceeded as expected, we monitored the application using AWS CloudWatch and included log statements for code testing and analysis.
The forthcoming diagrams will enhance your comprehension of its functionality. Keep reading to delve deeper!
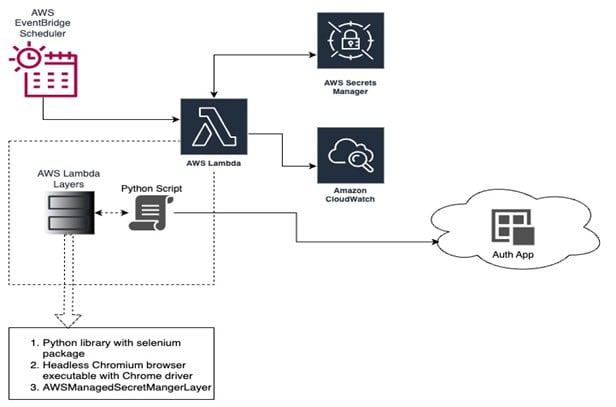
A. High-Level Architecture Diagram:
The architecture diagram below illustrates the interconnected services that collectively comprise the entire infrastructure solution:
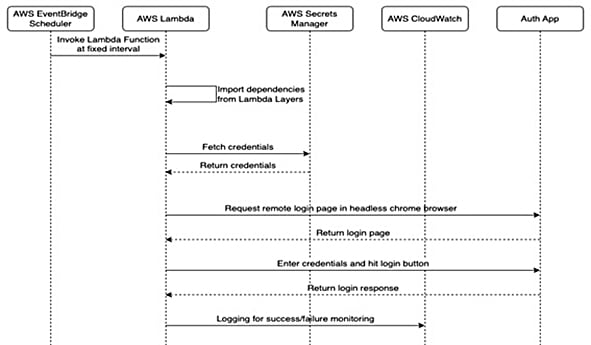
B. Sequence Diagram:
The sequence diagram below visually outlines the workflow, demonstrating the seamless flow of events from the scheduler to various service components, all crucial for the successful auto-authentication process:
Here are the pre-requites for a successful deployment:
Lambda supports layers that allow you to include external dependencies in your script. In our case, we needed to package system dependencies (Selenium library, headless Chromium, and Chrome Driver) as a zip file to be used with Lambda layers.
So, here are the 10 steps to create an automated login and perform other necessary tasks:
Want to get it done for real? Well, here’s a detailed explanation:
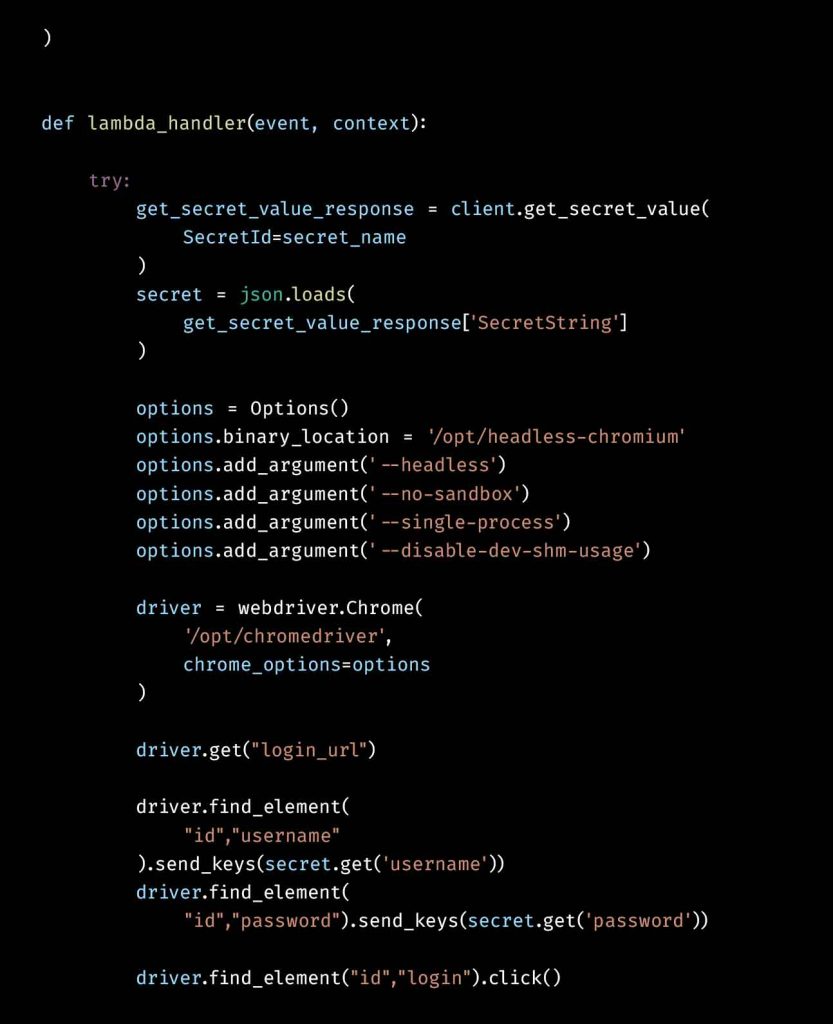
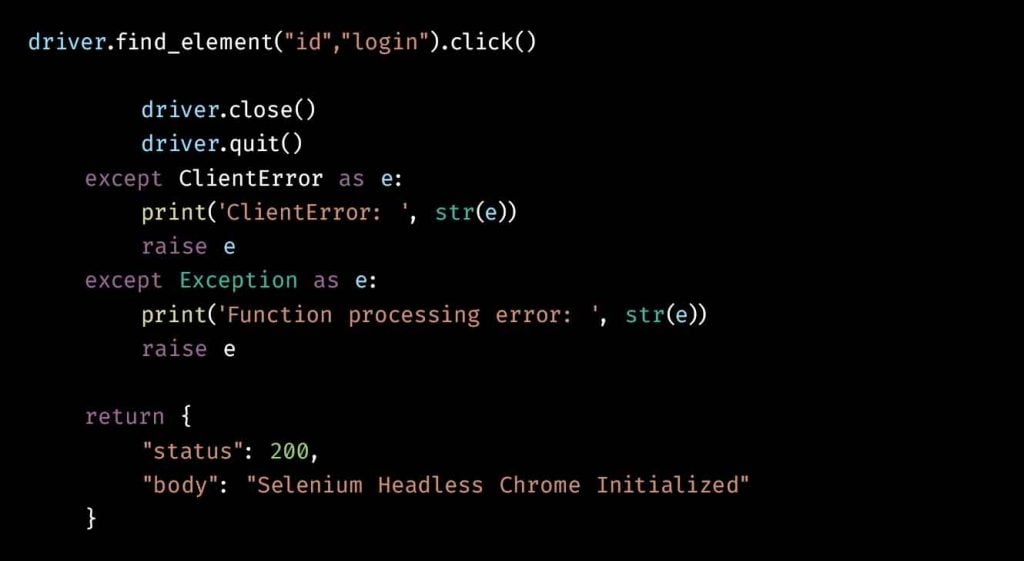
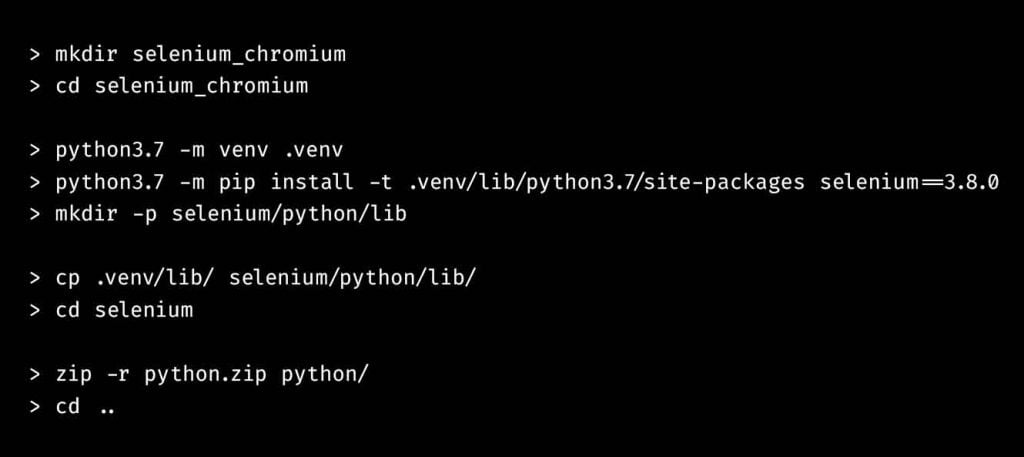
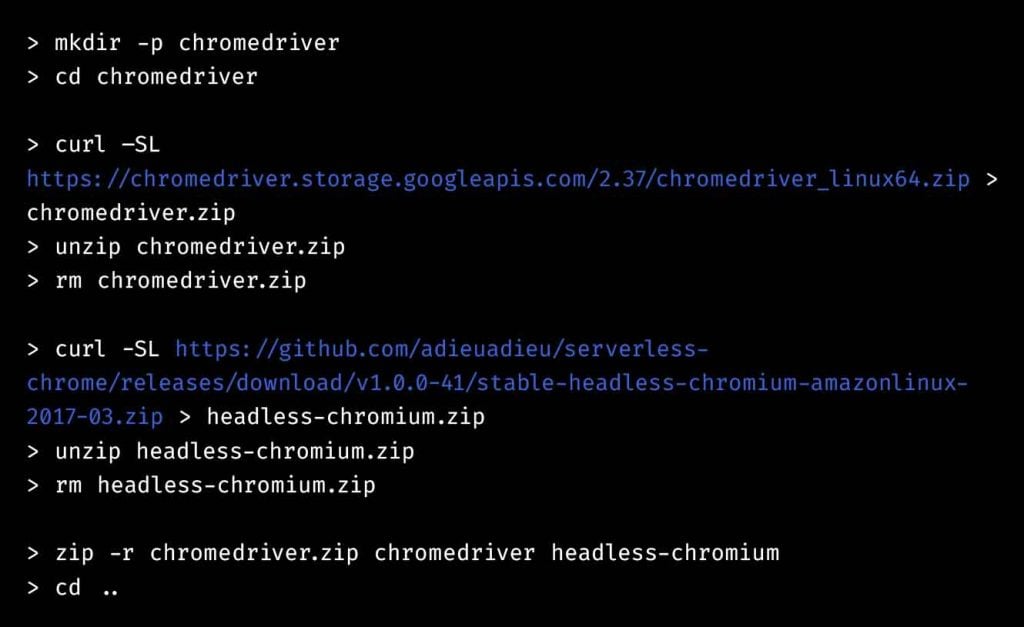
By default, a new role gets created whenever we try to set up a new lambda function or scheduler in AWS. But it’s good practice to keep a watch on the permissions assigned to these roles. This ensures proper security and functioning of the application.
Failure to assign the appropriate role at any step may result in an interruption of execution.
While defining custom role, we need to have an execution role that has AWS managed policies like – AWSLambdaBasicExecutionRole and AWSXRayDaemonWriteAccess assigned to it. Use the same role while setting up the lambda function or you can use the default option to let the new role get created automatically when setting up lambda function.
Then, attach SecretsManagerReadWrite policy to the role to get access to secret manager if needed.
Further, use AWS::Lambda::Permission to add a resource-based policy for the role assigned while configuring Scheduler (at step 8), so that it has the permission to invoke lambda function.
Follow steps at AWS Lambda documentation. Instead of using blueprint, use `Author from scratch` option.
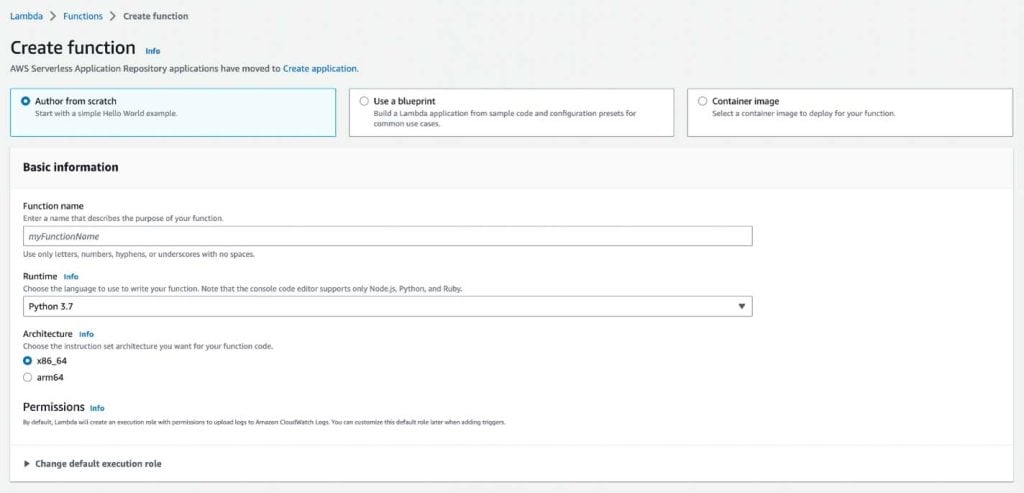
After this, we get the option to upload code as zip.
Next you can follow the steps from AWS Lambda > Create Layer documentation. Create two layers:
At this point, the script will get ready to run whenever the lambda function is invoked. Follow steps at AWS Lambda > Adding layers to function documentation. Select the AWS layer as given in screenshot below.
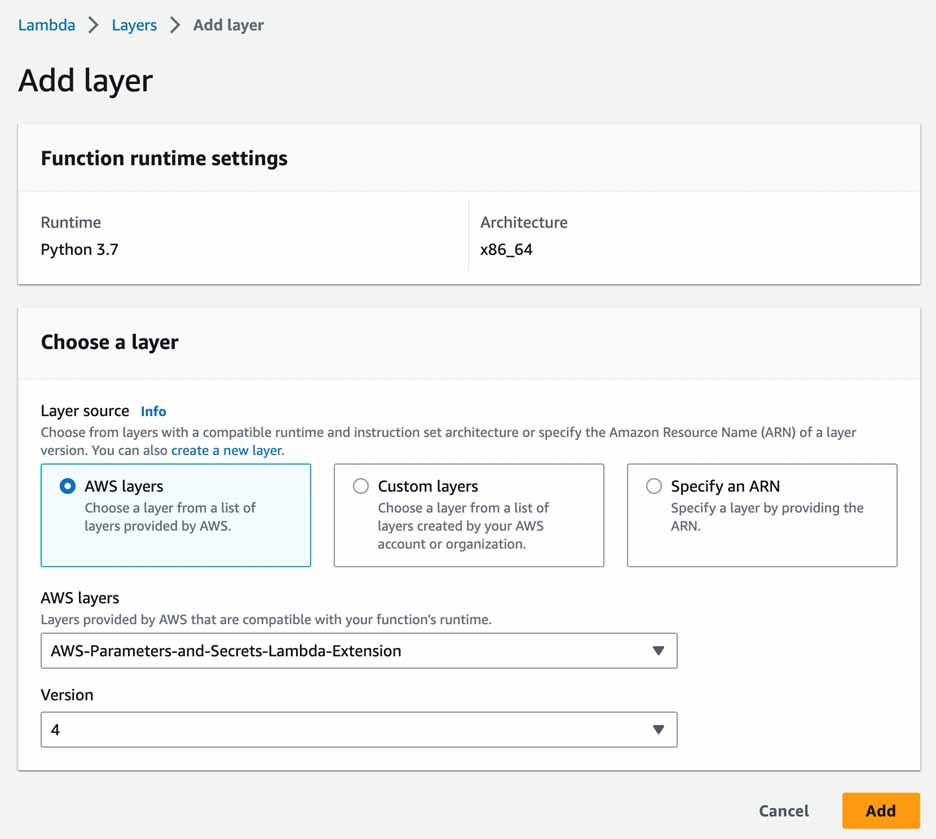
Ensure that the credentials specified in script at step 1 are configured in the Secret Manager. Follow these steps – AWS Secret Manager > Create a secret documentation.
Following these steps, the AWS Lambda function’s runtime settings and layers should resemble the configuration displayed in the screenshot below:

Now, the lambda function will be ready for execution, and it can be executed by invoking it from various sources like – AWS API Gateway, REST API call, or Event Bridge Scheduler.
Follow steps at AWS EventBridge Scheduler setup page. The user interface is intuitive and self-explanatory. You only need to specify the schedule for invoking the designated target and link it to the previously created and configured Lambda function.
On selecting the Lambda function, you’ll find a ‘Monitor’ tab that offers various monitoring options such as Metrics, Logs, and Traces for easily tracking and managing the application’s performance, as demonstrated below.

Two major steps need to be followed when talking about troubleshooting. They are:
a. First, verify appropriate roles/permissions
To do this, refer to step 4 above to validate the appropriate roles/permissions granted at each step for successful execution of each service.
b. Change the allocated memory and timeout of lambda function:
The script’s execution time can vary depending on the tasks it performs. To ensure smooth execution without Lambda interrupting due to a timeout error, it’s crucial to assign an appropriate timeout interval that allows the script sufficient time to complete its tasks.

I believe this should give you enough insight into how to utilize AWS Lambda service effectively for your scripting needs, regardless of the dependencies involved.
Remember, whether it’s ensuring user logins, automating critical processes, or managing various dependencies, Lambda offers a versatile solution. By implementing the above-mentioned steps, you can optimize your workflow and empower your applications to run seamlessly.
So, go ahead, explore the possibilities, and propel your projects to new heights.
Also, reach out to us at Nitor Infotech if you’d like to delve deeper into exploring additional insights.

we'll keep you in the loop with everything that's trending in the tech world.
