
In the fast-paced world of software development, bugs and errors are inevitable, but they can be costly if left undetected. With the growing complexity of software applications, ensuring that every component, service, and feature works flawlessly is crucial. Even the smallest issue can snowball into a bigger problem without proper testing, affecting user experience and overall application performance. Here, Angular unit testing enters as the solution to this challenge.
By writing effective unit tests, you can:
- catch bugs early
- improve code quality
- ensure that your application functions as expected
So, in this blog, I’ll walk you through everything you need to know about Angular unit testing. From the reasons why testing is essential to the tools available for testing, I’ll cover it all. You’ll also learn how to approach testing your Angular application with practical examples, helping you integrate testing seamlessly into your development workflow.
Let’s get started with the basics!
What is Angular Unit Testing?
Angular unit test cases are designed to validate the functionality of individual components, services, or functions within an Angular application. These tests target the smallest units of code to ensure that each piece operates as expected. They help to maintain the integrity of your application.
Here’s what you can do with Angular unit testing on your side:
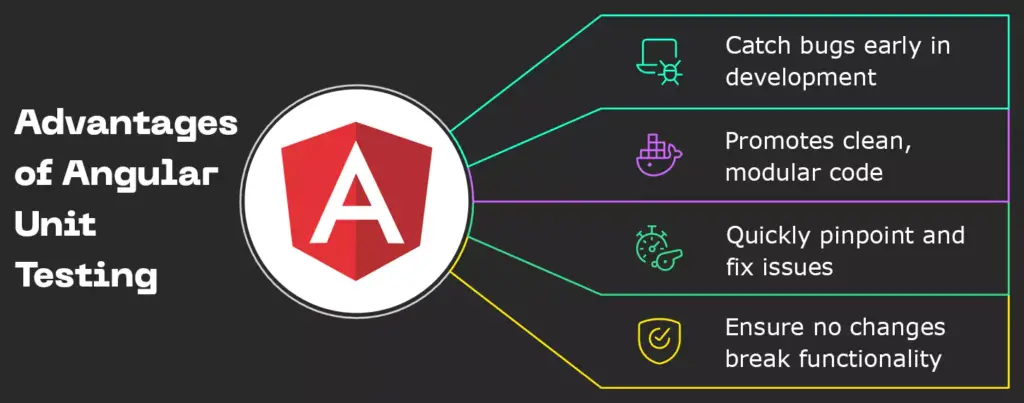
Fig: Advantages of Angular unit testing
In the Angular ecosystem, unit testing is commonly carried out using the Jasmine testing framework, with Karma serving as the default test runner to execute and report the results. This combination provides a seamless testing environment. It ensures reliable and efficient test execution.

Transform your AngularJS development with best practices and performance optimization tips.
Next, learn about basic commands for unit testing.
Which Unit Testing Commands Are Essential in Angular?
Here are the essential unit testing commands that you need to execute:
1. If you already have Node installed, you may execute this command:
npm install -g @angular/cli
2. Once done, you can check the current version of Angular CLI by running this:
ng version
3. Next, to run the unit tests for your project, simply use the command:
ng test
After a short while, a new tab or window will appear in your browser displaying the following page:

Fig: Browser output
Additionally, your terminal should display the following:

Fig: Console output
Let’s move toward learning about the tools required for unit testing in Angular apps.
What are the Best Tools for Angular Unit Testing Applications?
Here are the most popular tools that you can opt for unit testing in Angular applications:
- Jasmine: This is an open-source, Behavior Driven Development (BDD) framework that is free to use. It is compatible with any system that supports JavaScript. This makes it highly versatile for Angular applications.
- Karma: This is a test task runner that works in conjunction with Jasmine. It allows users to run tests in multiple real-time browsers through the command line. It ensures that your Angular app functions properly across different environments.
Note: When you create a new project using Angular CLI (with the command ng new appName), Angular automatically generates a default component along with a corresponding test file. This test file, ending in .spec.ts, where you can write unit tests for each component module, streamlining the testing process right from the start.
Now, head toward learning about the components of Angular testing.
What are the Components of Angular Testing?
In Angular testing, TestBed is the primary utility used to configure and initialize the testing environment, while async helps handle asynchronous operations during testing.
Within the testing framework, the describe block is used to group related test cases, and it can contain several other blocks such as it, beforeEach, and xit.
The beforeEach block is executed before each test case, ensuring that setup operations are performed before tests run. This setup can include simulating the declaration of components or modules. This is typically done within the beforeEach block, ensuring that each test starts with a clean, initialized state. Other blocks, like it, are independent and contain individual test cases.
Here’s a simple diagram showcasing the components of Angular testing:

Fig: Basic Angular testing components
When writing unit tests for Angular components, we often interact with both the component instance and its rendered output.
Here’s a breakdown of how Angular’s testing utilities help test components effectively:
1. The compileComponents object is invoked to compile your component’s resources, including the template, styles, and other assets. This is how you can do it:
describe("UserService", () => {

beforeEach(async(() => {

TestBed.configureTestingModule({

declarations: [

AppComponent

],

}).compileComponents();

}));

it('should create the app', async(() => {

const fixture = TestBed.createComponent(AppComponent);

const app = fixture.debugElement.componentInstance;

expect(app).toBeTruthy();

}));

});
2. The fixture.debugElement.componentInstance creates an instance of the AppComponent class. In our case, we verified that this instance was successfully created by using the toBeTruthy assertion.
This is the command that you can use to do the same:
it(`should have as title 'angular-unit-test-learning'`, async(() => {

const fixture = TestBed.createComponent(AppComponent);

const app = fixture.debugElement.componentInstance;

expect(app.title).toEqual('angular-unit-test-learning');

}));
The example above shows how to access the properties of the created AppComponent. The only default property is title.
3. You can easily verify whether the title you set has changed by checking the instance of the AppComponent using this command:
it('should render title in a h1 tag', async(() => {

const fixture = TestBed.createComponent(AppComponent);

fixture.detectChanges();

const compiled = fixture.debugElement.nativeElement;

expect(compiled.querySelector('h1').textContent).toContain('Welcome to angular-unit-test-learning!');

}));
This demonstrates how the test simulates a real browser environment. After creating the component, we call detectChanges to simulate how the component would behave in the browser.
Once the component is rendered, you can access its child elements using the nativeElement object of the component (i.e., fixture.debugElement.nativeElement).
Keep reading to learn about service and async operation testing!
How to test Angular Components with Service Dependencies?
In Angular, services often rely on other services injected into their constructors.
a. You can easily make these dependencies available by adding providedIn: ‘root’ to the service. This way you allow it to be used across any component or service.
Here’s the code to create the dependency:
import { UserService } from "./User.service";

describe("UserService", () => {

let service: UserService;

beforeEach(() => {

service = new UserService();

});

});
b. In the beforeEach block, an instance of UserService is created to ensure it’s initialized once and reused across other tests. This prevents duplication.
The test it checks if a new user post is added to the array like this:
it("should create a post in an array", () => {

const userText = "This is my first user";

service.addNewUser(userText);

expect(service.userList.length).toBeGreaterThanOrEqual(1);

});
c. To test a component with a service dependency in Angular, in our example app, the UserService is injected into the UserComponent to provide access to its properties. These are required for rendering the view.
Here’s what can be done:
let component: UserComponent;

let fixture: ComponentFixture<UserComponent>;

beforeEach(() => {

TestBed.configureTestingModule({

imports: [FormsModule],

declarations: [UserComponent]

});

});

beforeEach(() => {

fixture = TestBed.createComponent(UserComponent);

component = fixture.debugElement.componentInstance;

});

it("should use the userList from the service", () => {

const userService = fixture.debugElement.injector.get(UserService);

fixture.detectChanges();

expect(userService.getAllUsers()).toEqual(component.userList);

});
d. Next, the userService variable stores the injected instance of the UserService. At this stage, the component has not yet been rendered. It will only be rendered once the detectChanges method is invoked.
Here’s how:
it("should create a new post", () => {

component.userText = "I love this test";

fixture.detectChanges();

const compiled = fixture.debugElement.nativeElement;

expect(compiled.innerHTML).toContain("I love this test");

});
e. The nativeElement object provides access to the rendered HTML element, making it easier to verify if the added user text appears in the displayed content.
Here’s how:
it("should disable the button when textArea is empty", () => {

fixture.detectChanges();

const button = fixture.debugElement.query(By.css("button"));

expect(button.nativeElement.disabled).toBeTruthy();

});

it("should enable button when textArea is not empty", () => {

component.userText = "I love this test";

fixture.detectChanges();

const button = fixture.debugElement.query(By.css("button"));

expect(button.nativeElement.disabled).toBeFalsy();

});
Note: Apart from having access to the HTML contents, you can also get an element using its CSS property. When the userText model is empty or null, the button is expected to be disabled.
Moving onto async operation!
How to test Asynchronous Operation in Angular with SpyOn?
Here’s how you can test asynchronous methods in Angular:
a. First, define the asynchronous method fetchUsersFromServer() in the service. This represents an async task that returns an array of users after two seconds.
Here’s how to do it:
fetchUsersFromServer(): Promise<UserModel[]> {

return new Promise((resolve, reject) => {

setTimeout(() => {

resolve([new UserModel("I love unit testing", "Mon 4, 2018")]);

}, 2000);

});

}
b. Next, use spyOn to mock the behavior of the fetchUsersFromServer method. It takes two arguments: userService (the service injected into the component) and the fetchUsersFromServer method.
Here’s how to do it:
it("should fetch data asynchronously", async () => {

const fakedFetchedList = [

new UserModel("I love unit testing", "Mon 4, 2018")

];

const userService = fixture.debugElement.injector.get(UserService);

let spy = spyOn(userService, "fetchUsersFromServer").and.returnValue(

Promise.resolve(fakedFetchedList)

);

fixture.detectChanges();

fixture.whenStable().then(() => {

expect(component.fetchedList).toBe(fakedFetchedList);

});

});
On doing these, fetchUsersFromServer returns a promise. Additionally, spyOn mocks the method, chaining it with a fake promise using returnValue that resolves with a list of users to simulate its behavior.
Further, explore how to effectively test Angular pipes and Angular directives!
How to test Angular Pipes?
Let’s say, in our app, we have an Angular pipe that formats dates for display. We need to write tests to ensure it consistently and accurately transforms various inputs. This is shown in the code snippet below:
import { DateFormatPipe } from './date-format.pipe';

describe('DateFormatPipe', () => {

const pipe = new DateFormatPipe();

it('should format "2023-12-15" to "15/12/2023"', () => {

expect(pipe.transform('2023-12-15')).toBe('15/12/2023');

});

it('should handle null input by returning an empty string', () => {

expect(pipe.transform(null)).toBe('');

});

});
How to test Angular Directives?
Let’s assume we have a directive called HighlightUserDirective, which is a special Angular feature that modifies the appearance of an element. Specifically, it changes the background color of a user when they are selected.
Here’s the code snippet to test Angular directives:
import { Component } from '@angular/core';

import { TestBed, ComponentFixture } from '@angular/core/testing';

import { HighlightUserDirective } from './highlight-user.directive';

@Component({

template:`<div [appHighlightUser]="isSelected" class="user">Test User</div>`

})

class TestUserComponent {

isSelected = false;

}

describe('HighlightUserDirective', () => {

let component: TestUserComponent;

let fixture: ComponentFixture<TestUserComponent>;

beforeEach(() => {

TestBed.configureTestingModule({

declarations: [TestUserComponent, HighlightUserDirective]

});

fixture = TestBed.createComponent(TestUserComponent);

component = fixture.componentInstance;

});

it('should highlight user when selected', () => {

component.isSelected = true;

fixture.detectChanges();

expect(fixture.nativeElement.querySelector('.user').style.backgroundColor).toBe('yellow');

});

it('should not highlight user when not selected', () => {

fixture.detectChanges();
expect(fixture.nativeElement.querySelector('.user').style.backgroundColor).toBe('');

});

});
The above test serves as a blueprint that checks whether the directive correctly applies a style like changing the background color when a user is selected or not.
Before we finish, make sure to check out the final section, which explains how you can automatically generate Angular unit tests. This willsave your time and ensure more efficient test coverage for your application.
How to automatically generate an Angular unit test?
The Angular ecosystem offers the ngentest package, designed to automate the generation of test specs for components, directives, and more.
If you’ve developed a component and need to create tests for it, here’s how you can do it:
1. Simply install the ngentest package to streamline the process, with this command:
$ npm install ngentest –g
2. Next, run the following command to auto-generate the unit test specifications for your component:
$ gentest component-name.ts
3. You can also auto-generate the unit test specifications for directives, pipes, and services, using this command:
$ gentest directive-name.ts -s # output to directive-name.spec.ts

$ gentest pipe-name.ts # output to pipe-name.test.ts

$ gentest service-name.ts. # output to service-name.test.ts
That’s it! Following the above-mentioned steps for each of the components, you can perform Angular unit testing efficiently.
Quick recap:
- Unit testing is essential for robust, maintainable Angular apps.
- Effective test cases ensure components, services, and pipes work as expected.
- Early bug detection improves the development cycle.
- Jasmine and Karma streamline the testing process.
- Mocking dependencies, clearing test structure, and ensuring quality assurance are the best practices.
Unit testing is an integral part of building robust and maintainable Angular applications. By writing and executing effective test cases, developers can ensure their components, services, and pipes function as expected while catching bugs early in the development cycle. Tools like Jasmine and Karma make the testing process efficient, while best practices such as mocking dependencies, maintaining clear test structure, and focusing on high coverage levels contribute to quality assurance.
By investing time in writing comprehensive unit tests, you not only enhance your application’s reliability but also boost team confidence in deploying changes. So, start small, improve iteratively, and make testing a core part of your development workflow.
Reach us at Nitor Infotech to explore modern software testing solutions and cutting-edge software development services, paving your way to success in 2025.
To perform Angular unit tests, you need to set up an environment using Jasmine and Karma, which are integrated into Angular CLI.
First, install Angular CLI and create a project with ng new. Then, write tests in .spec.ts files, where components, services, or other Angular features are tested.
For example, testing a component involves using the TestBed to configure the module, create the component instance, and write assertions for its behavior. For services, you can mock dependencies and use TestBed to inject them.
Additionally, asynchronous code can be tested using Angular’s async or fakeAsync utilities. Finally, run the tests using ng test, which runs the tests in a browser through Karma, ensuring that your Angular app functions as expected.


