
If you have worked with geospatial data, you would possibly want to harness the power of PostGIS. In case you haven’t, do check out my previous blog to gain an understanding of geospatial data. PostGIS is an extension of PostgreSQL which adds spatial ability to your database. Reading, analyzing, and processing geospatial files (viz. .shp, .tif) requires special tools. However, conducting SQL operations to achieve the same makes it more consistent for developers.
PostGIS allows you to load and query geospatial data from the database for representational purposes very easily. This blog is going to give you all the help to get you started with PostGIS, including installation steps for Windows and Linux. Read on to understand the process:
Installation for Windows
Before you put your PostGIS lab goggles on, you need to have all the precursors in place and that includes mainly having your windows installed. Here’s how you get that done:
- Install Postgres on the system using: https://www.enterprisedb.com/downloads/postgres-postgresql-downloads.
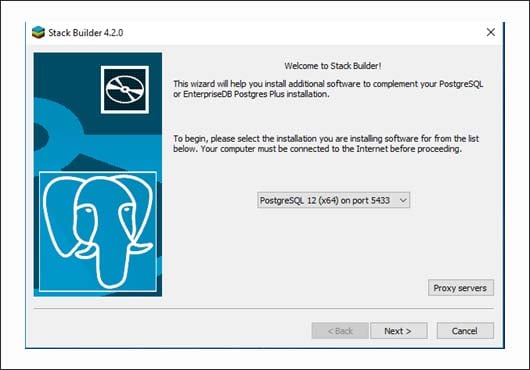
- It adds Stack Builder to your system automatically, run Stack Builder to set up PostGIS.
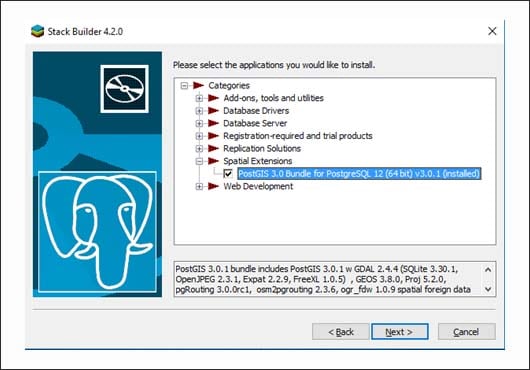
3. Select the PostGIS bundle and hit next.
4. Follow the steps given in the setup to complete the installation.
Setting up PostGIS
Once the installation steps are completed, go to pgAdmin or any other database client and create a new database. Postgres by default contains one extension i.e., plpgsql. To add PostGIS as an extension, run the following query on your database.
create extension postgis;
After running the above query, a new extension will be added which can be viewed under the extensions.

Along with this extension, a new table named ‘spatial_ref_sys’ with srids and projections will be created. This table contains all spatial references and is used for transformations.
Installation for Linux
1. Refresh the local package index.
sudo apt-get update
2. Install the Postgres package along with contrib that adds some additional utilities and functionality.
sudo apt install postgresql-11 postgresql-contrib
4. Install the PostGIS package on the system.
sudo apt-get install postgis
4. Connect to a database.
psql -d <database>
5. Next, enable the PostGIS extension on the database. PostGIS’s features need to be activated on a per-database basis before you can store spatial data.
CREATE EXTENSION postgis;
6. Verify that everything worked correctly.
SELECT PostGIS_version();
You’ll see this output:
        postgis_version
        ---------------------------------------
3.0 USE_GEOS=1 USE_PROJ=1 USE_STATS=1(1 row)
Loading data
Geospatial data can be loaded in different ways based on the kind of files that are storing them. For now, we will consider shapefiles, a widely used form of storing vector data. Shapefiles can be loaded into the database in the following two ways:
1.Using PostGIS Bundle
a. Look for “postgis bundle 3 for PostgreSQL x64 Shapefile and DBF” in your applications, it is usually downloaded with PostGIS. Use the PostGIS extension to connect to your newly created database by adding details such as hostname, port and database name. On successful connection, you will see the following message:
Connecting: host=localhost port=5433 user=postgres password=’********’ dbname=test client_encoding=UTF8
Connection succeeded
b. Now click on ‘Import’ and select ‘Add File’. Select all the shape files you would like to import.

c. Add the SRID if it is missing and click on ‘Import’. This will import each shape file as a relational model in your database.

d. On describing any of these tables, you will be able to see the columns along with the geom column which represents the actual geospatial information. It comprises the latitude and longitude.

In order to view the data, you will need to query the geom column from any of the tables:

2. Using command line
The standard tool for loading shape file is “shp2pgsql”. It can be found in the bin folder of the Postgres installation. This is how it can be used:
shp2pgsql [<options>] <shapefile> [[<schema>.]<table>]
shp2pgsql -s 4326 subway_stations public.nyc_subway_stations | psql -h localhost -p 5433 -U postgres -d test
Querying data
This data can be queried in many forms to generate the desired visualizations. A geom can either be a POINT, LINESTRING, POLYGON or a combination of these. Various operations like calculating the distance between two points, area, intersection etc. can be queried from the data using certain predefined postgis methods. Some of the commonly used methods are: ST_Length, ST_Area, ST_Contains, ST_Intersection, ST_Equals, ST_Within, ST_Scale, ST_Translate.
One of the most widely used and accepted formats of geospatial data that can be integrated with maps like leaflet is called geoJSON. PostGIS can be directly queried to generate response in the geoJSON format like:
select
json_build_object( 'type', 'FeatureCollection', 'features', json_agg(st_asgeojson(t.*)::json))
  from
(select gid, name, geom from ${tablename} ) as t(id, name, geom);
This is how an actual geoJSON looks:
{
    "type": "FeatureCollection",
    "features": [
        {
            "type": "Feature",
            "geometry": {
                "type": "Point",
                "coordinates": [
                    -76.935256783,
                    38.9081784965
                ]
            },
            "properties": {
                "gid": 1,
                "name": "one"
            }
        },
        {
            "type": "Feature",
            "geometry": {
                "type": "Point",
                "coordinates": [
                    -76.9750541388,
                    38.8410857803
                ]
            },
            "properties": {
                "gid": 2,
                "name": "two"
            }
        }
    ]
}
A lot of modern tools today rely on geospatial data. PostGIS can provide insights by using these methods of storing and querying such data with greater ease.
Reach out to us or visit Nitor Infotech if you have any comments or suggestions related to this topic. My upcoming final blog in this series will introduce you to GeoServer, so keep watching this space!


