The primary objective of this blog is to help you to create Microsoft Azure build/release DevOps pipelines to automate your SQL deployments. Additionally, we will also cover prerequisites which are needed for creating database projects/pipelines. With this help, you can implement and maintain automated processes for SQL deployments. Following is the prerequisite for creating an Azure build/release pipeline:
SSDT on a local machine
SSDT (SQL Server Data Tool) is required for creating a database project and for syncing your code to the Azure DevOps repository. Now that that’s in order, we can focus on getting started. If you are new to this process and want to create a database with the help of CI/CD process from scratch, then this blog will walk you through the process of:
- Consolidating SQL objects
- Creating a database project
- Deploying a database to a target server with the help of Azure DevOps
This blog includes three sections:
Three sections of the blog
Creating your first Database Project
So, without further ado, let’s get started on creating your first database project! The first step is to consolidate SQL objects. If you have SQL objects present on any Azure repository, then you just need to clone that and start building pipelines. If not, create a database project and a check-in solution on the Azure repository. There are two ways to consolidate your SQL objects:
1. Importing objects from SQL server: With this, you can consolidate your SQL objects in a standard manner like tables, store procedures, views, functions, etc.
2. Importing objects from Visual Studio: With this, you can consolidate your SQL objects in the form of schema.
You can go with either of these ways to create your first database project.
4.1 Importing objects from SQL server
4.1.1 Importing SQL objects from SQL server
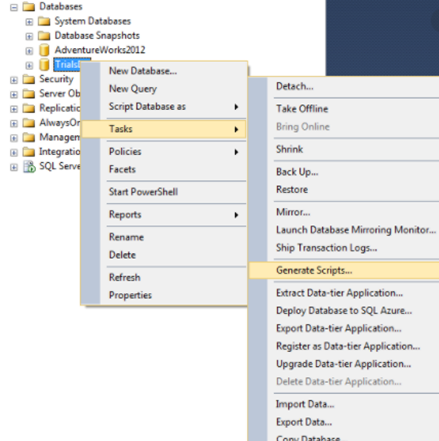
1. Open SSMS.
2. Select any database > Right click on it > Go to Tasks > Go to Generate scripts
Creating your first Database Project
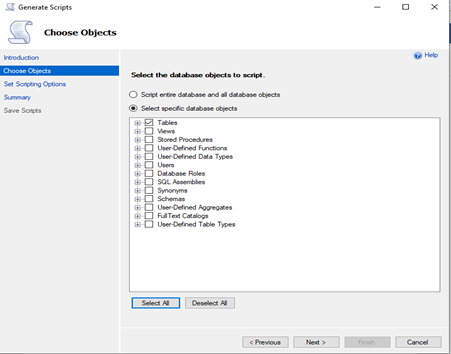
3. Select database objects like Tables, Views, Stored procedures, Functions etc. as per your convenience and click on Next.
4. Save the file – Single file for all scripts or Single file per script. (It’s better to save a single file per script)
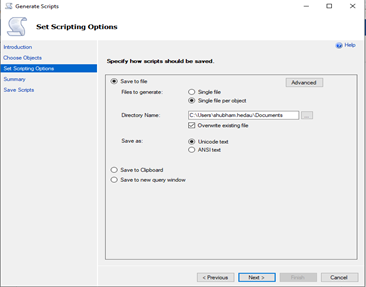
Create a separate folder to keep all SQL objects to consolidate all your SQL objects in one place.
Now it’s time to add all the consolidated SQL objects into one SQL database project in Visual Studio. Before that, make sure that you create a repository on the Azure portal. Once the repository is created, clone the same repository on your local machine to create an SQL Server database project inside cloned code.
4.1.2 Creating an SQL Server Database Project
To create the SQL Server database project, you need to have SSDT installed in your system. If not, you can easily download it from the web and install it.
1. Sign into your Azure DevOps organization and navigate to your project.
2. Clone the code locally and keep it in one folder.
3. Open the cloned code in Visual Studio.
4. Once the code opens, right-click on Solution > Go to Add > Go to New
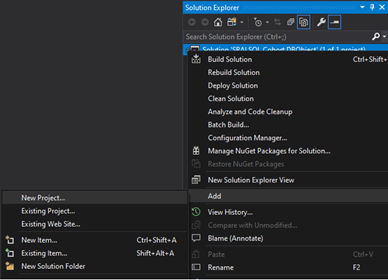
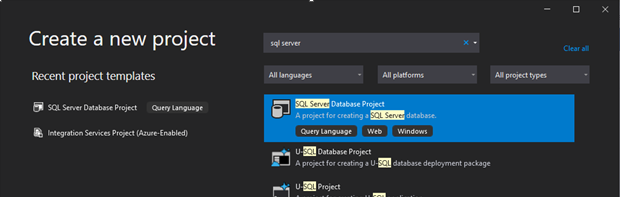
5. Search ‘SQL Server’ and click on ‘SQL Server Database Project’. Enter a suitable name and path and click on Create.
6. Once the database project is created, you can add your SQL objects which we have consolidated in section 4.1.1 and maintain a proper folder structure.
After consolidating all your scripts, you can check-in your code in Azure DevOps.
4.2 Importing objects from Visual Studio
This is another way of creating your first database project.
1. Open Visual Studio.
2. Click on ‘Create new project’.
3. Search ‘SQL Server’ and click on ‘SQL Server Database Project’. Enter a proper name and path and click on ‘Create’.

4. Open SQL Server Object Explorer and login to your local DB.
5. After successful login, expand databases, right-click on the database that you want to import and select Create New Project.
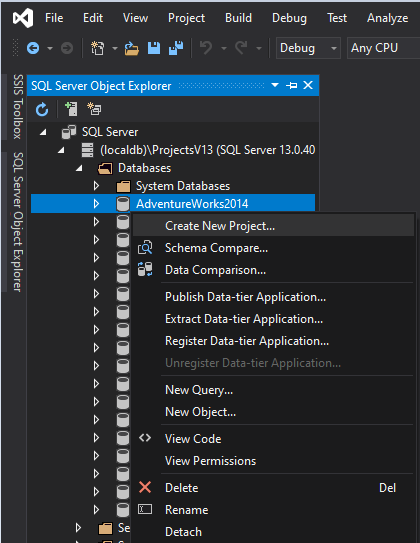
6. Enter a name and a path for the project and click on Start.
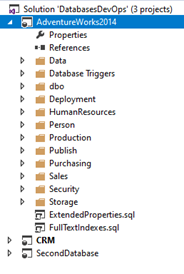
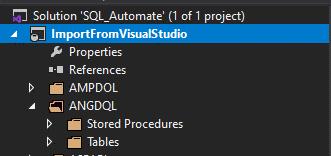
7. Once the above process is complete, you can see your consolidated objects with schema names.
Now you are ready to check-in your code. You need to create a pull request and get it approved from your co-worker. Once that’s done, your code will merge in Master branch. Note: If you are pushing your changes from any of your local branches, then you need to raise a pull request; otherwise, it’s unnecessary. Once your code merges in the master branch, the build and release pipeline process will start.
After this, we will focus on creating your first Azure build pipeline.
Creating your first Azure DevOps Build Pipeline
1. Sign into your Azure DevOps organization and navigate to your project.
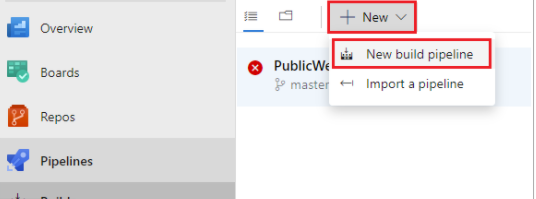
2. In your project, navigate to the Pipelines. Then create a new build pipeline.
3. Follow the steps of the wizard by first selecting Azure Repos Git as the location of your source code. Master will be the default branch.
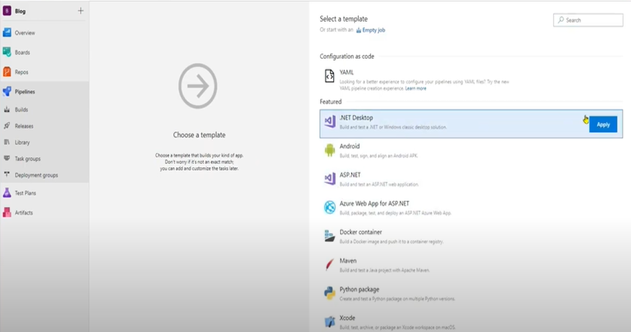
4. You will be redirected to the next page to choose a template. Use .Net Desktop as the default template.
5. Go to Pipelines and select your solution. I selected **\*.sln as the solution.
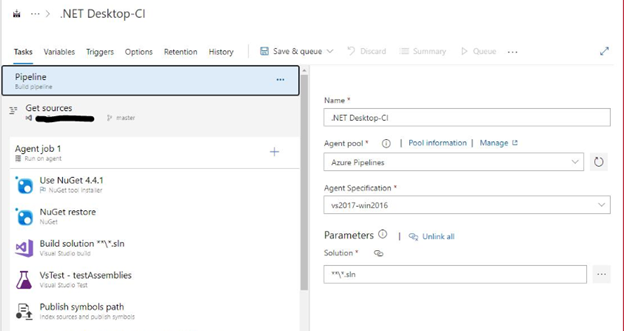
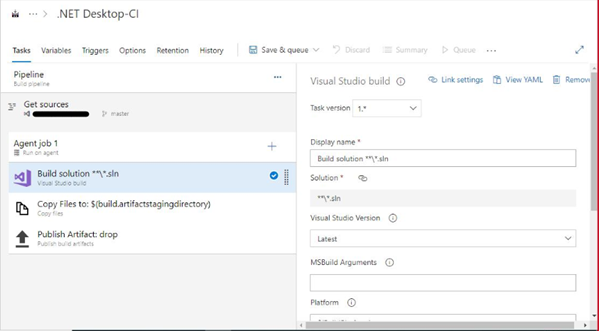
6. Select tasks to create build pipeline. Select the following three tasks for this process:
a) Build solution: This task will build your solution again on the Azure platform. Make sure you select Solution. Keep all the other fields as they are.
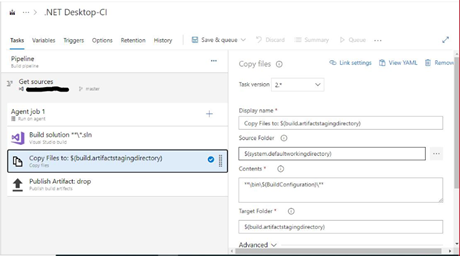
b) Copy Files To: Use this task to copy files from a source folder to a target folder using match patterns. This will copy all the files from the build configuration that are being released. I copied files to the target folder – $(build.artifactstagingdirectory).
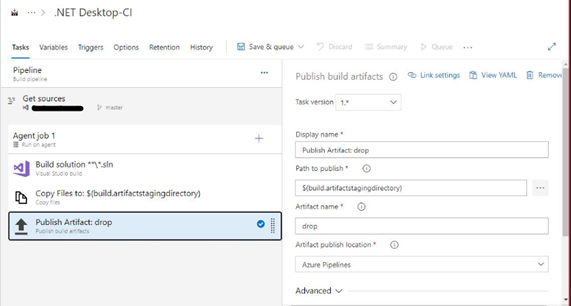
c) Publish Artifact: Use this task in a build pipeline to publish build artifacts to Azure Pipelines, TFS, or a file share. I chose ‘drop’ as the artifact name.
7. After adding the above three tasks, click on Save & queue. Also, you can change the name of the build pipeline.
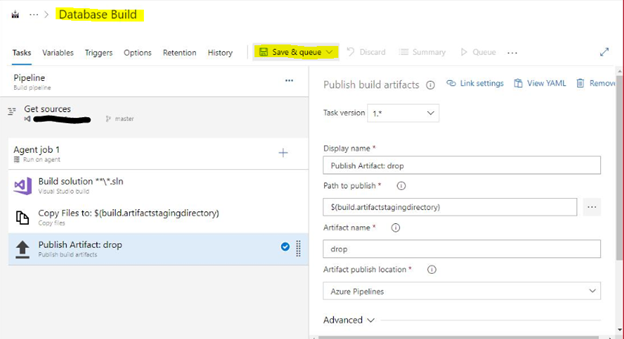
8. The queued build will look for an available agent job and will execute all the tasks which we have defined in the pipeline.
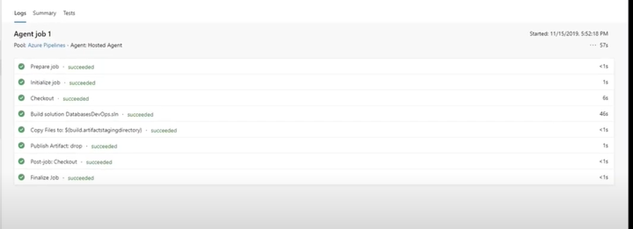
This build pipeline will execute every time you merge code in Master branch. And there you go! You have created your first build pipeline.
Creating your first Azure DevOps Release Pipeline
Now let’s see how you can create your first Azure release pipeline. The following will be responsible for deploying your database/SQL scripts on the target server:
1. Sign into your Azure DevOps organization and navigate to your project.
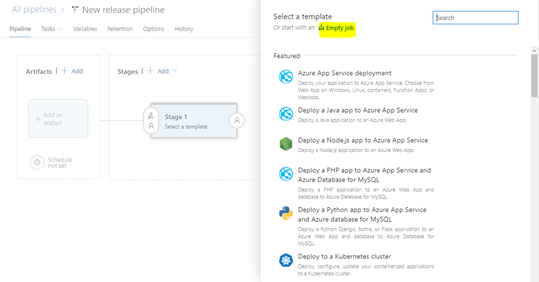
2. In your project, navigate to the Releases. Then choose the action to create a new release pipeline.
3. Do not select any template (Keep it empty) and click on Empty job. Enter a suitable name. If you try to search for any template, there is no specific template for Azure database.
Creating your first Azure DevOps Build Pipeline
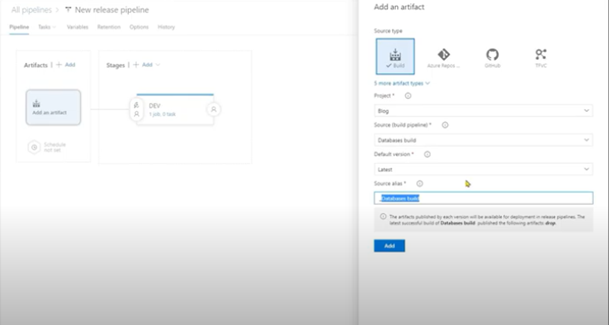
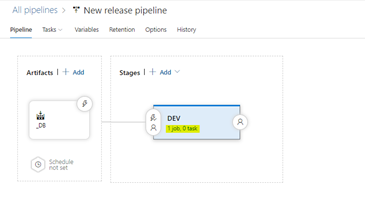
4. Click on Add an artifact and fill appropriate values in the fields. I selected ‘Blog’ under Project, ‘Databases build’ under Source (build pipeline), and ‘Latest’ under Default version.
Creating your first Azure DevOps Release Pipeline
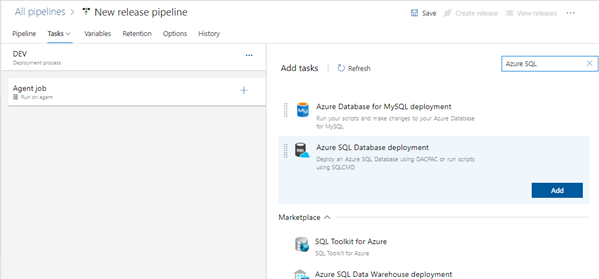
5. Click on Job/Task.
6. Select + and select the task – Azure SQL Database deployment.
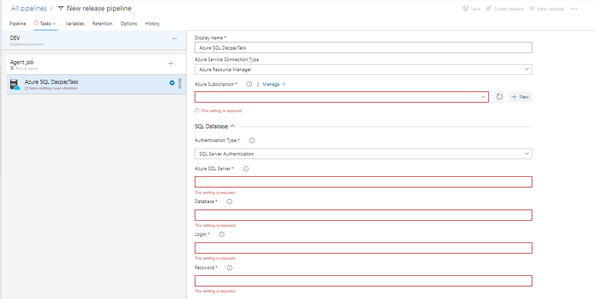
7. Numerous fields will appear like Display name, Azure Subscription, Target SQL server name, Database, User ID, and Password. Fill in all the necessary information carefully.
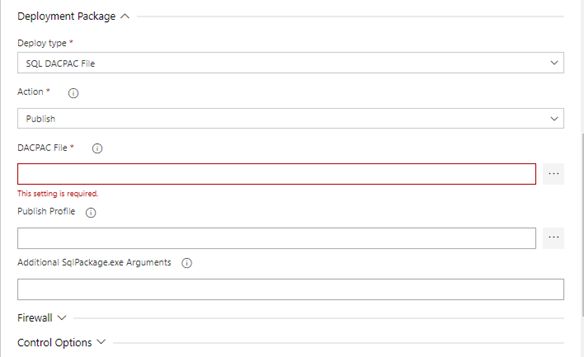
Make sure you select Deploy type as SQL DACPAC File and action type as Publish. Browse the DACPAC file by clicking on the three dots.
8. Once all the above steps are completed, enter a suitable name for the release pipeline and save it. I entered ‘Azure SQL DacpacTask’ as the display name.
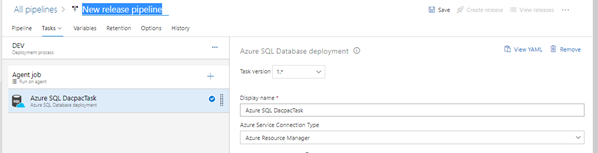
Once saved, select Create Release and execute. Voila! You have created your first Azure DevOps release pipeline. You can now easily create Azure DevOps build/release pipelines that will enable you to automate your SQL deployments.
Reach out to us at Nitor Infotech to learn more about the process of creating build/release pipelines and how you can make the most of the various benefits associated with it.


