
Best Practices and Tips for NPM Package Creators
What is npm?
In the dynamic world of software development, prioritizing efficiency and collaboration is essential. Enter the npm package, the Node Package Manager, which stands as the largest and most extensive software registry on the internet. With a staggering repository boasting over a million packages, npm has become the lifeblood of developers and organizations worldwide.
At its core, the npm package serves as a thriving ecosystem where developers can effortlessly publish and share their code with the global community. This collaborative approach has revolutionized the way software is created, accelerating development cycles, and fostering innovation.

Optimize your business performance and tech strategy with the right fit from Node.js, Java, or .NET.
This blog will illuminate the significance of npm and guide you through the process of crafting and publishing your own npm package. Thus, making it accessible for others to download and integrate into their projects.
Let’s commence with the advantages!
What makes npm the ideal choice for your development needs?
npm, with its primary mission of facilitating code distribution among developers, offers a host of compelling advantages that have made it the preferred choice for countless companies and individuals alike:
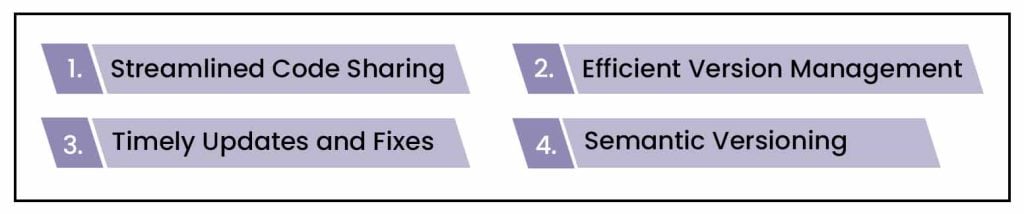
- Streamlined Code Sharing: npm allows for effortless sharing of code, whether within the confines of an organization or publicly. This fosters collaboration and knowledge sharing, ultimately leading to more efficient development processes.
- Efficient Version Management: Managing multiple versions of a codebase has never been easier. npm’s version control capabilities enable developers to seamlessly juggle different iterations of a package, ensuring compatibility and flexibility in their projects.
- Timely Updates and Fixes: With npm, staying up to date is a breeze. Developers can swiftly send updates and fixes to their packages, ensuring that applications remain current and secure in a rapidly evolving software landscape.
- Semantic Versioning: It embraces semantic versioning, a structured approach to version numbering. This practice fosters clarity and predictability in software development, making it easier for developers to understand the impact of updates and changes.
Having explored the significance of npm, allow me to guide you through the complete process of creating, testing, and publishing a npm package.
How to create npm package?
Walking into the world of npm package creation can be an exciting endeavor for any JavaScript developer. Let’s get this process started without further ado!
Step 1: Having Node.js already installed on your machine puts you one step ahead in the process. However, if you haven’t installed it yet, there’s no need to worry. You can obtain it directly from its official website.
Step 2: Once the installation is complete, open your terminal within your working folder and execute this command:
> npm init
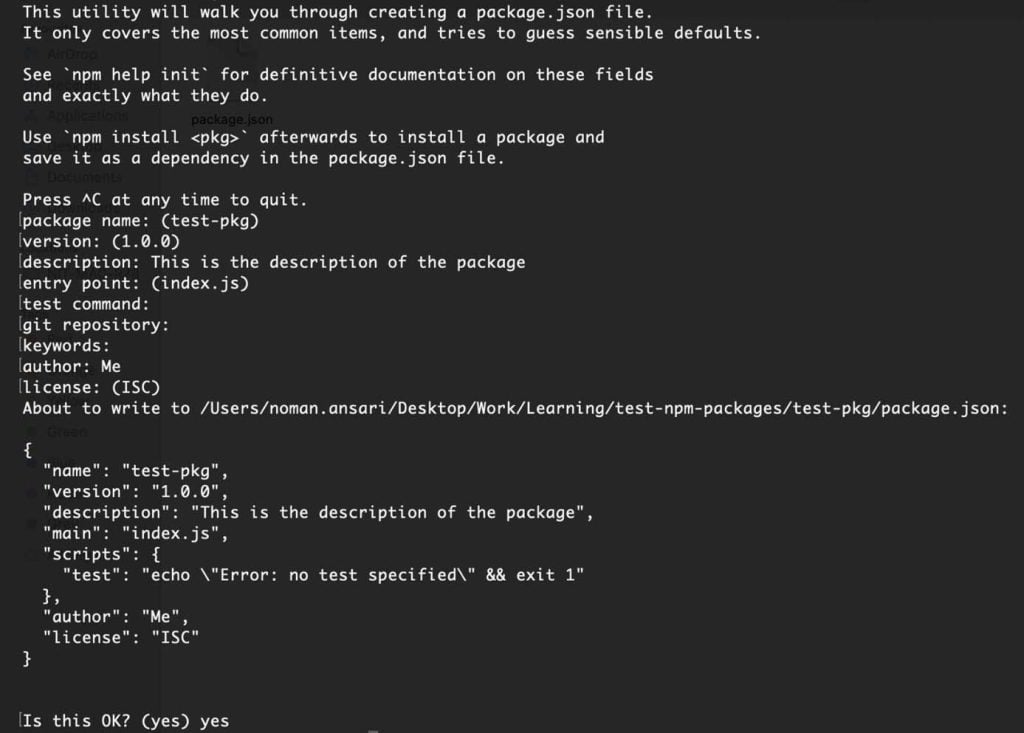
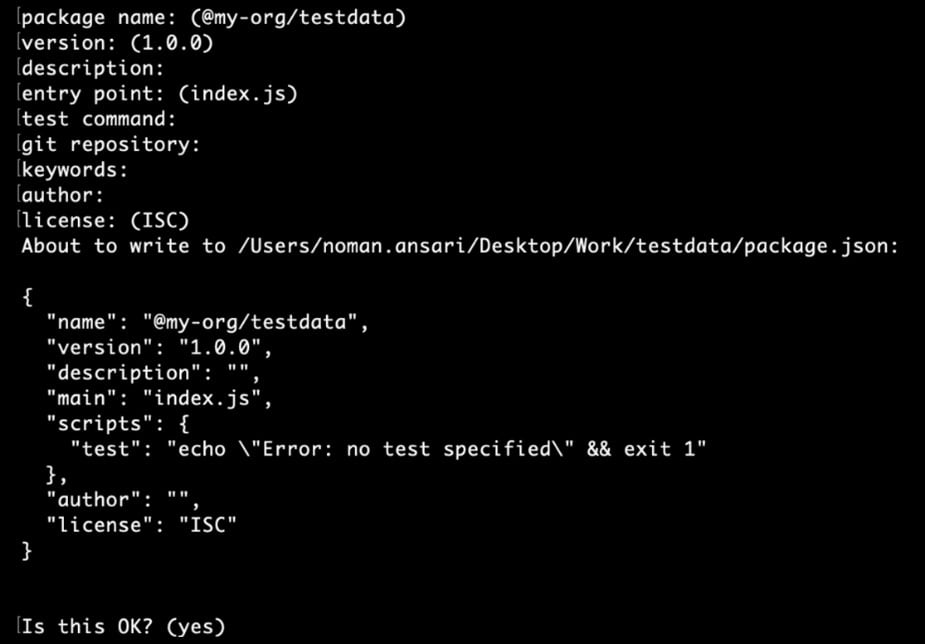
Executing the aforementioned command will generate a package.json file. When you run this command, you’ll be prompted to provide various details such as the package’s name, version, package description, GitHub URL, and more, as shown below:
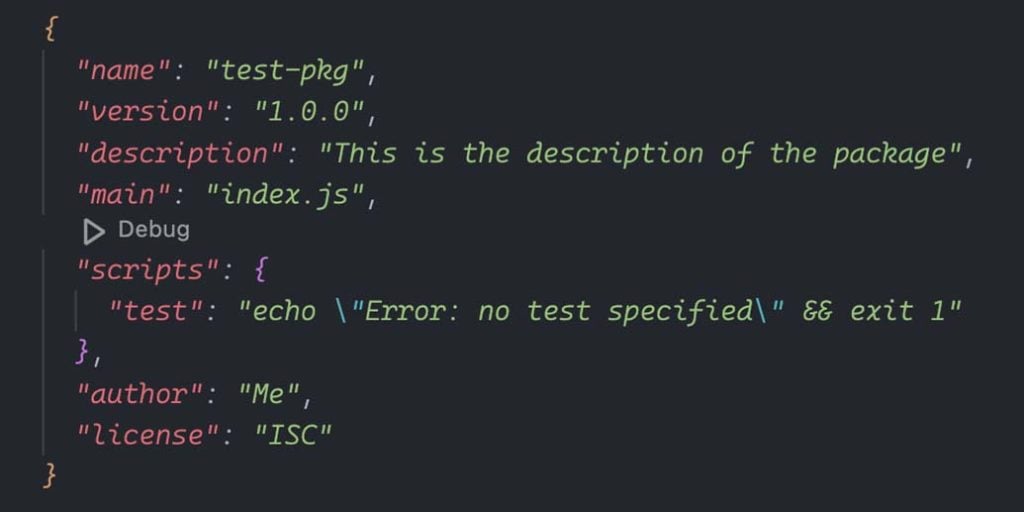
With your package.json now created, you’re all set to begin coding, starting with the index.js file.
function add(num1, num2) {
return num1 + num2;
}

module.exports = {
add,
};
Step 3: Once you’ve completed your code modifications, it’s time to consider publishing your npm package. However, before taking that step, it’s crucial to thoroughly test your package. One highly recommended approach is to conduct local testing, and this is how you can do it:
- To initiate this process, navigate to the root directory of your package folder and execute the following command:
> npm link

This informs Node.js that the package is available globally and can be utilized by your local machine’s packages for testing purposes.
- Create a test folder, and within it, include a script.js file.
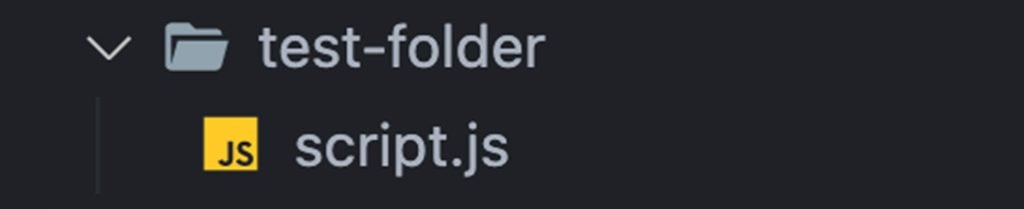
Head to your script.js file located within the test folder and run this:
> npm link <name-of-your-package>

Note – Inside the ‘script.js’ file, you can now import your package and utilize it for testing purposes.
For example: const <variable-name>=require(<name-of-your-package>);
import add from 'test-pkg';

console.log(add(10, 10));
- Next, assess your package’s functionality by running this:
> node scripts.js

- Based on the outcome, you can verify whether the results align with your expectations or not.
Now, let’s proceed to the much-anticipated step – publishing npm!
How to successfully publish an npm package?
After successfully testing your package, it’s time to take the next step and publish it to the npm registry. Here’s a step-by-step guide for you to successfully publish npm:
Step 1: Before commencing the package publishing process, it’s essential to ensure you have a npm account. If you don’t already have one, you can easily create it by visiting the npm registry website.
Step 2: Once you’ve successfully created your account, open your terminal, and navigate to the root directory of your package. From there, execute the following command:
> npm login
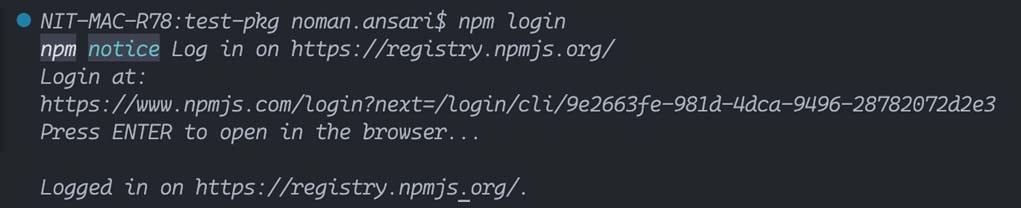
Upon successful login, expect to encounter a message like this:
> Logged in as <your-username> on https://registry.npmjs.org/
Step 3: Next, for publishing unscoped packages, there is no additional fee required for npm publishing. You can now proceed by running the following command to publish your package on the npm registry:
> npm publish --access=public
By default, the package access is configured as private. Therefore, we include the ‘–access’ flag with the ‘public’ value to make it publicly accessible during the upload process.
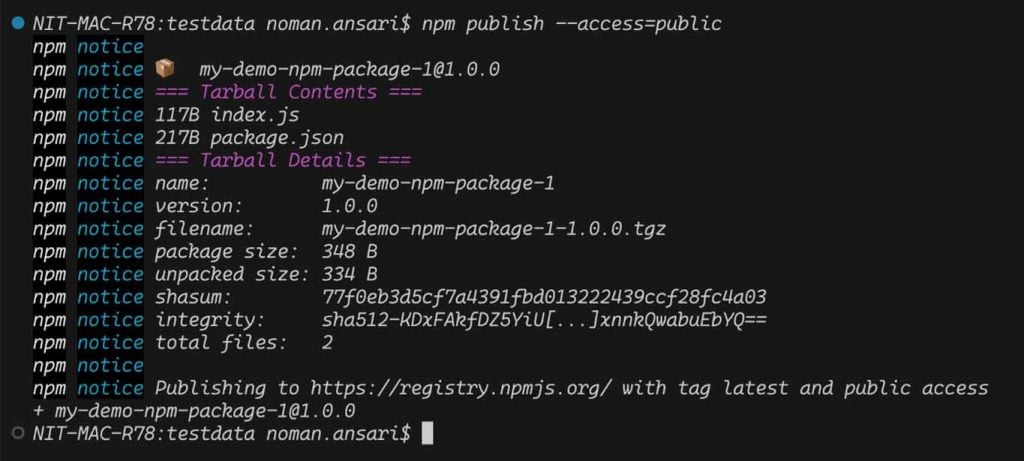
Visit the npm website and perform a search for your package. Your package should then appear in the search results.
How can we effectively upload scoped and private packages?
Whether you intend to share your code within a confined private organization or in public, you can utilize namespaces to categorize your packages accordingly.
Note:
- To publish npm packages, you need to sign up for a npm user account. To publish organization-scoped packages, first, create an npm user account, and then set up an npm organization.
- For the use of scoped and private packages, npm incurs a monthly fee of $7.
Publishing Scoped Public Packages:
Here are the steps to publish scoped public packages:
1. Initialize your package with a scope using the following command:
> npm init --scope=@my-org
OR
For a user-scoped package, replace my-username with your username by running this command:
> npm init --scope=@my-username
2. Complete the package details such as name, version, description, GitHub URL, etc.
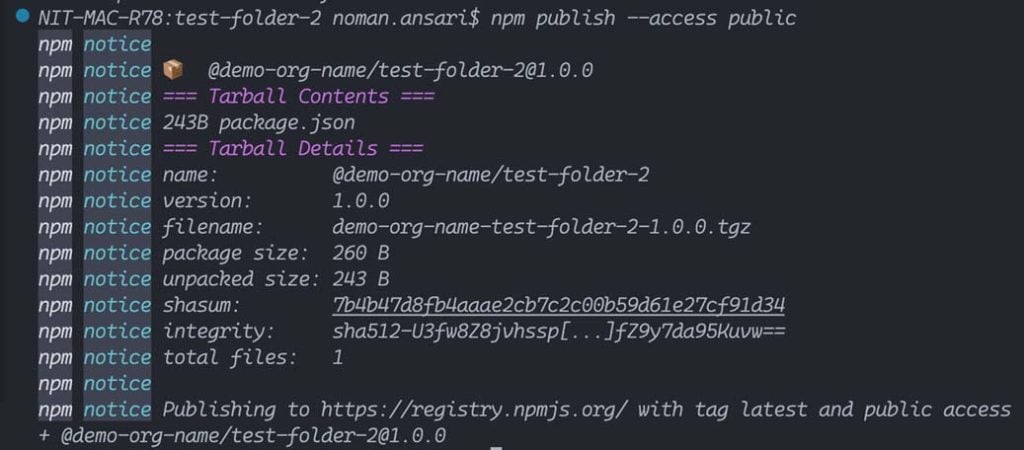
3. Test your code and, by default, scoped packages are published as private. To publish it publicly, use:
> npm publish --access=public
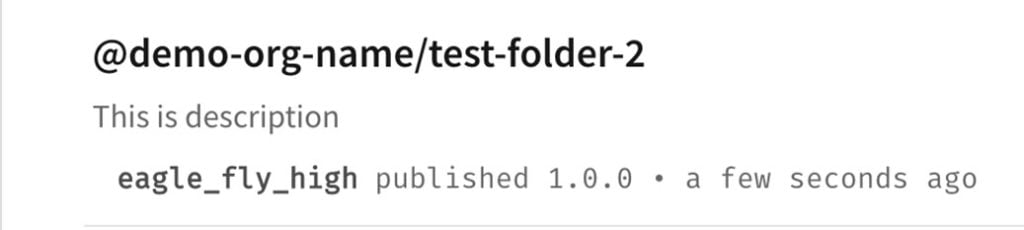
After publication, you can search for your package in the npm directory.
Publishing Private Packages:
To publish private packages, follow these steps:
1. Initialize your package with a scope:
> npm init --scope=@my-org
OR
For a user-scoped package, replace my-username with your username by running this command:
> npm init --scope=@my-username
2. This command generates a package.json file and prompts you for package details like name, version, description, and GitHub URL.
3. After finalizing your code, test it, and then publish it. By default, scoped packages are published as private, so you can simply use:
> npm publish
Further, let’s learn about versioning your npm packages to maintain compatibility, stability, and trust among developers.
Versioning npm packages
npm adheres to semantic versioning, which employs a three-part versioning scheme with periods, comprising:
- major
- minor
- patch.
1. Major version: Here, the version number increases when significant changes that break compatibility occur in the package. Users may need to adjust their code based on the instructions provided in the documentation.
For example: version: 1.0.0
export const add = (num1: number, num2: number) => {
return num1 + num2;
};
In the 1.0.0 version, the code accepts two numeric parameters and returns their sum.
Next up is version: 2.0.0
export const add = (num1: string, num2: string) => {
return parseInt(num1) + parseInt(num2);
};
In version 2.0.0, a notable change occurred where the parameter type has shifted from number to string. This alteration could potentially lead to code crashes during an upgrade from 1.0.0 to 2.0.0, necessitating users to modify the argument type in function calls accordingly.
2. Minor version: This version advances when new features are introduced or existing features are enhanced, without necessitating any code adjustments on the user’s part. Users can seamlessly upgrade their package version without concerns about code-related issues.
For example: in versions 1.0.0 we only have an ‘add’ function.
export const add = (num1: number, num2: number) => {
return num1 + num2;
};
Later, in version 1.1.0, we introduced an additional feature: the ‘subtract’ function.
export const add = (num1: number, num2: number) => {
return num1 + num2;
};
export const substract = (num1: number, num2: number) => {
return num1 – num2;
};
So, alongside the existing add function, we’ve introduced a new subtract function, requiring a minor release (1.1.0) to introduce these enhancements.
3. Patch version: Version updates in this category encompass the resolution of security vulnerabilities and bug fixes. These alterations are typically minor and have minimal impact on the software’s functionality or capabilities.
For example: The function below is intended to calculate the sum of numbers from 1 to n. However, upon closer inspection, it becomes evident that there is a flawed condition within the loop, which could lead to an infinite iteration.
export const sumOfNnumbers = (n: number) => {
let sum = 0;
for (let i = 1; i >= n; i++) {
sum += i;
}
return sum;
};
Hence, we modify the condition:
export const sumOfNnumbers = (n: number) => {
let sum = 0;
for (let i = 1; i <= n; i++) {
sum += i;
}
return sum;
};
The above change fixes a bug hence this will go in the patch version.
Hey, are you familiar with Caret (^) and Tilde (~) in the context of software versioning? If not, I’ll explain them in the upcoming section.
Understanding Caret (^) and Tilde (~)
When specifying dependencies in package.json the caret and tilde symbols play an important role in specifying the range of the versions. Let’s get to know them better!
Caret: This symbol signifies that npm restricts updates to the minor and patch versions of a dependency, refraining from updating the major version. For instance, it will update to versions like “5.9.0” or “5.10.1” but not to “6.0.0” and beyond when executing “npm update.”
Example: “^5.1.1”
Tilde: The tilde symbol (~) exclusively triggers updates to the patch version of a dependency, leaving the minor and major versions untouched during a “npm update” operation.
Example: “~5.1.1”
A trick to remember – A simple mnemonic for distinguishing between these symbols is to think of a house: the tilde (~) corresponds to the floor, while the caret (^) represents the rooftop.
![]()
In addition to these, there are other shorthand symbols for specifying version ranges, including ^, ~, >=, <, and ||. While caret is the most used, these other symbols are also valuable. For a deeper dive, you can explore an excellent interactive example on the npm SemVer Calculator website.
A few other versioning notations include:
- Latest Patch Version: To get the latest patch version, use the notation “5.0.x”. This will install the most recent version for the patch version (e.g., 5.0.6).
- Latest Minor and Patch Version: To get the latest minor and patch version, use the notation “5.x.x.”. This will install the most recent version for the minor and patch version (eg: 5.1.7 or 5.7.1 etc)
Onwards to updating dependencies!
Updating Dependencies
Running “npm install” installs packages from package.json into the “node_modules” folder and creates a package-lock.json. Without package-lock.json, it may not fetch the latest minor version even with the caret (^) symbol.
Note: “npm install” fetches compatible versions without package-lock.json. So, even with a caret (^), you might not get the latest minor version.
Use the “npm update” command to update version numbers in package.json. Unlike “npm install,” “npm update” fetches the most recent version within the specified range, also updating package-lock.json.
How to capture the exact version?
The package-lock.json file plays a crucial role in documenting the precise versions installed during the initial setup and subsequent installations. It ensures that any future “npm install” commands retrieve identical information. This is particularly valuable for team collaboration and achieving reproducible outcomes.
So, the future of npm appears promising, with:
- anticipated growth
- enhanced security measures
- improved performance
- extensive adaptability to evolving needs
- increased community involvement
Therefore, build with npm as it is poised to remain an indispensable tool for JavaScript and Node.js developers, continually evolving to meet the demands of the ever-changing landscape of web development.
Quick info – for those who want to create react native package with npm!
If you want to install React Native with npm and develop packages using the old react-native CLI, it can become a challenging process. Fortunately, the community has introduced a helpful tool known as “create-react-native-library.” This tool offers a streamlined code and testing workflow, enabling you to create high-quality React Native libraries. You can find detailed documentation for this tool on GitHub, while the process of publishing the package to the npm registry remains unchanged.
Psst! Get a quick read on the future of Java, Node js, and .NET, and join hands with Nitor Infotech for a seamless software engineering run.


