Power BI is a data visualization software which is used to run reports and establish insights based on a company’s data. The deployment pipeline is an efficient and reusable tool that enables BI creators to manage the lifecycle of the organizational content. In my blog, I will elaborate the implementation of CI/CD pipelines using Azure DevOps which will permit you to deploy your local report to your Power BI service automatically.
Pre-requisites
You must meet certain conditions to access the deployment pipeline features. The conditions include-
1. You should have one of the following Premium licenses:
- You should be a Power BI Pro user and belong to an organization that has Premium capacity.
- Premium Per User (PPU).
2. You should be an admin of a new workspace experience.
Power BI Data Pipeline Deployment Stages
The three stages of Power BI deployment pipeline are –
1. Development: In this stage, you can design, build, and share Power BI reports and their content.
2. Test: In this stage, you can upload the modified report content so it can be moved to the test stage. You can follow these steps in the test environment:
- Share content with testers and reviewers
- Load and run tests with larger volumes of data
- Test your app to see how it will look for your end users
3. Production: After testing the report content, you can use the production stage to share the final report content with the business users across the organization.
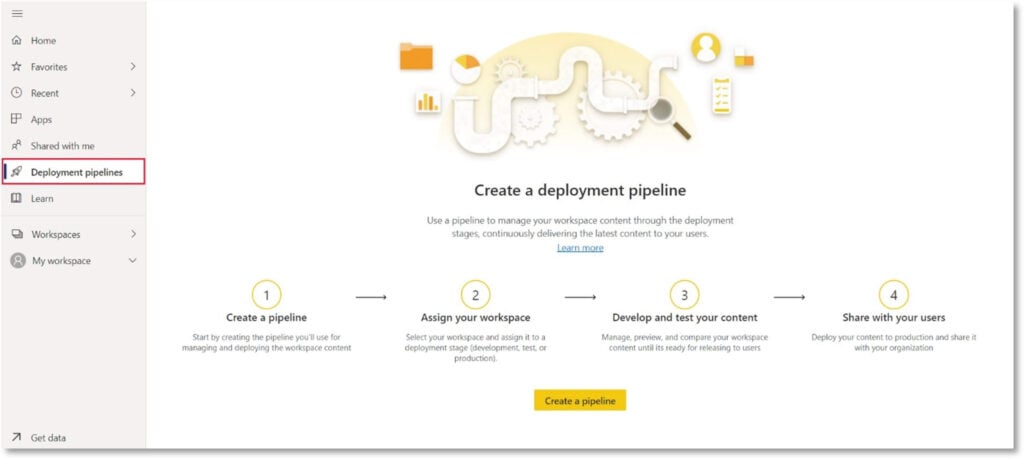
How to get started with deployment pipelines?
Follow these steps to get started with deployment pipelines-
1. Go to the navigation panel on the left side, then select ‘Deployment pipeline’ and click on’’ Create pipeline’.
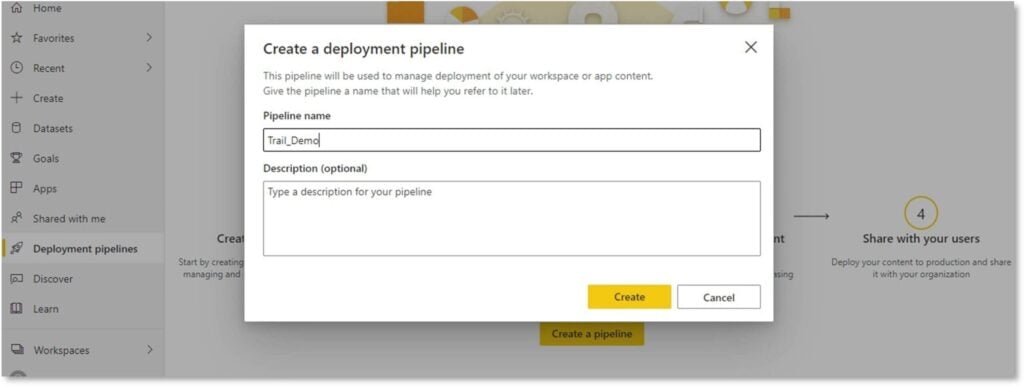
2. A pop-up will appear. Enter the pipeline name and description (Optional)
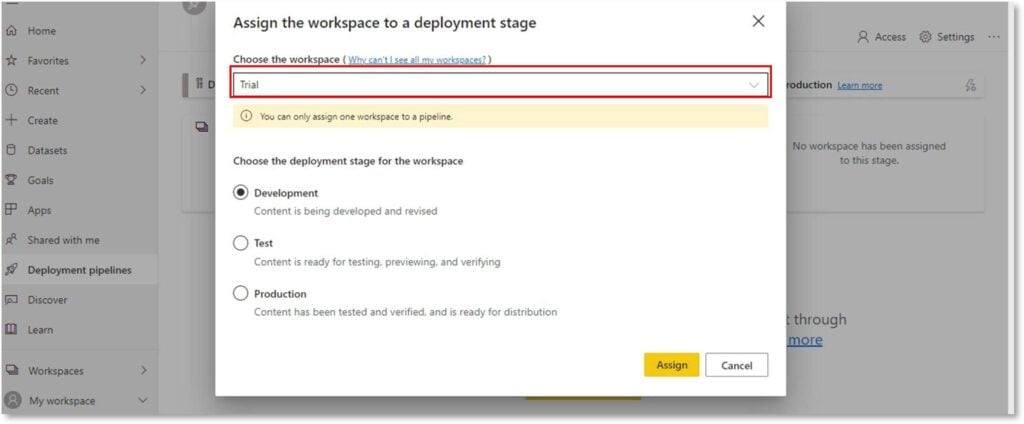
3. Assign a workspace to the deployment pipeline. As you have now created a pipeline, you need to add Power BI report content to the pipeline, which can be done by assigning a workspace to the pipeline stage.

4. Select the workspace from the drop-down menu that you want to assign to the pipeline. Then select the stage you want to assign to the workspace.
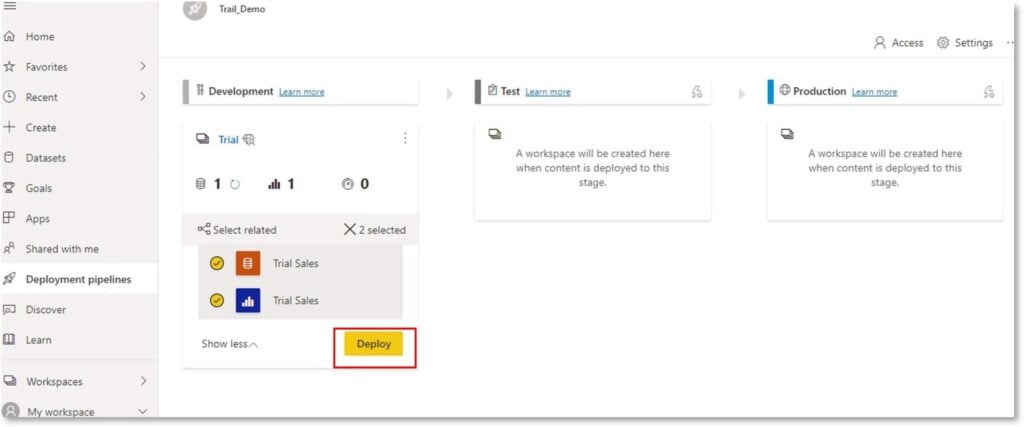
5. In this stage, you can select items that you want to deploy to the next stage. Click on the ‘’Deploy’ button. The deployment process creates a duplicate workspace in the test or target stage.
Note-
- To see the latest data, refresh the dataset after each deployment. During the deployment process, new features/updates copy the Power BI metadata from the selected stage into the target stage. It only copies the metadata and not the data within the datasets.
- You cannot deploy a report or a dashboard to the next stage if the items dependent on it do not exist in the stage you are deploying it to.
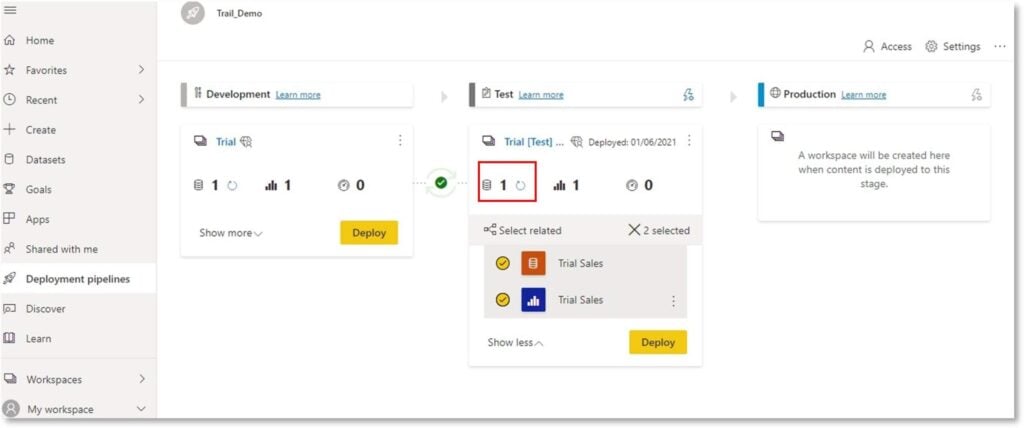
6. The orange indicator means that the content between pipelines do not match and are not identical.
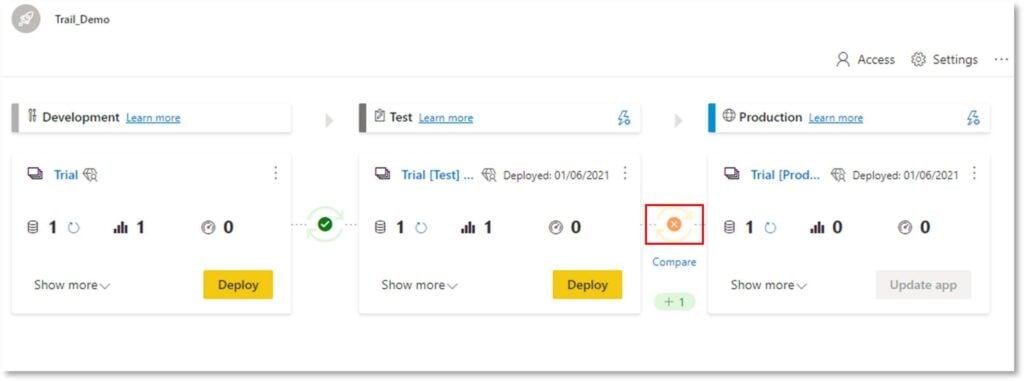
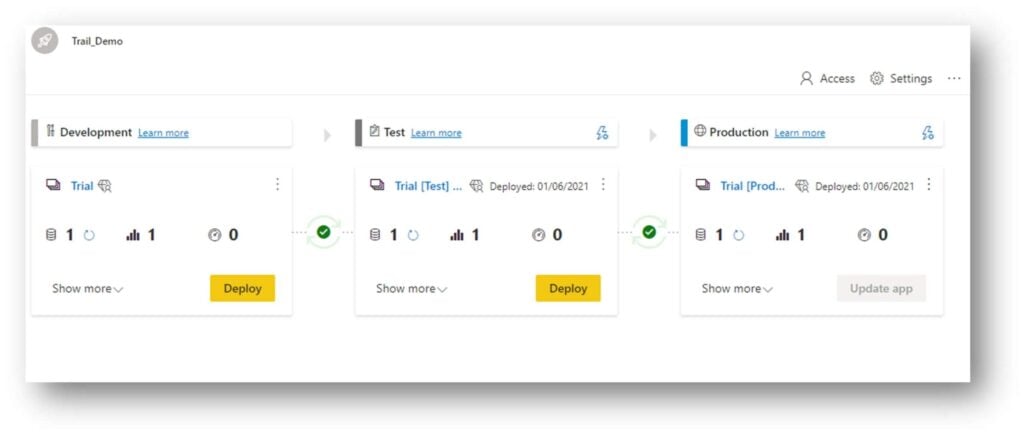
7. The following image shows how you have deployed your reports/dashboards from development to test and test to production environment.
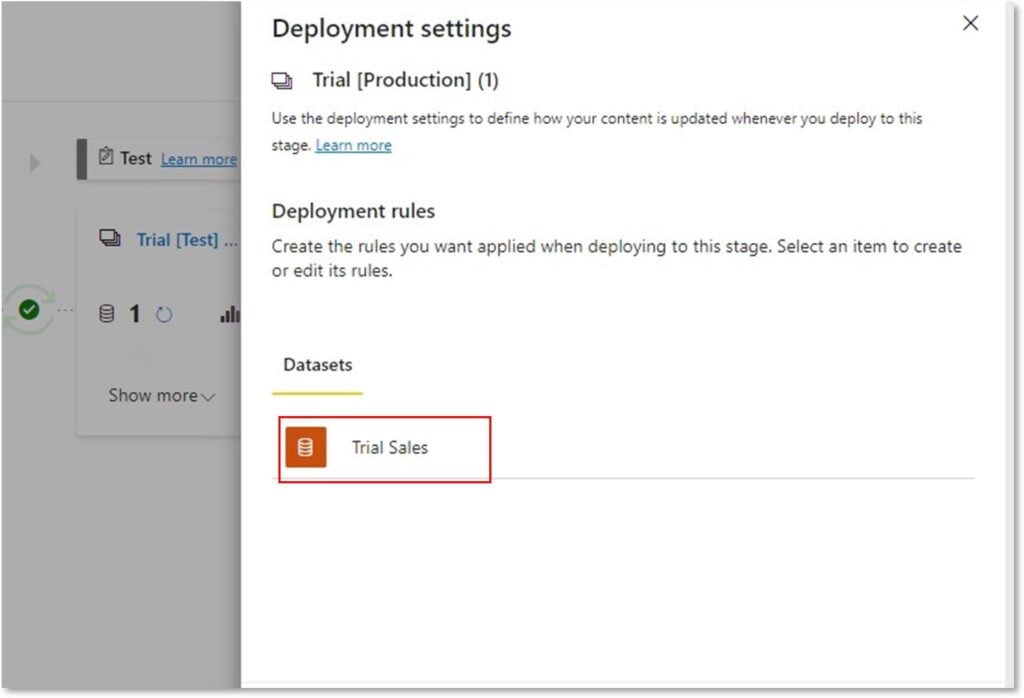
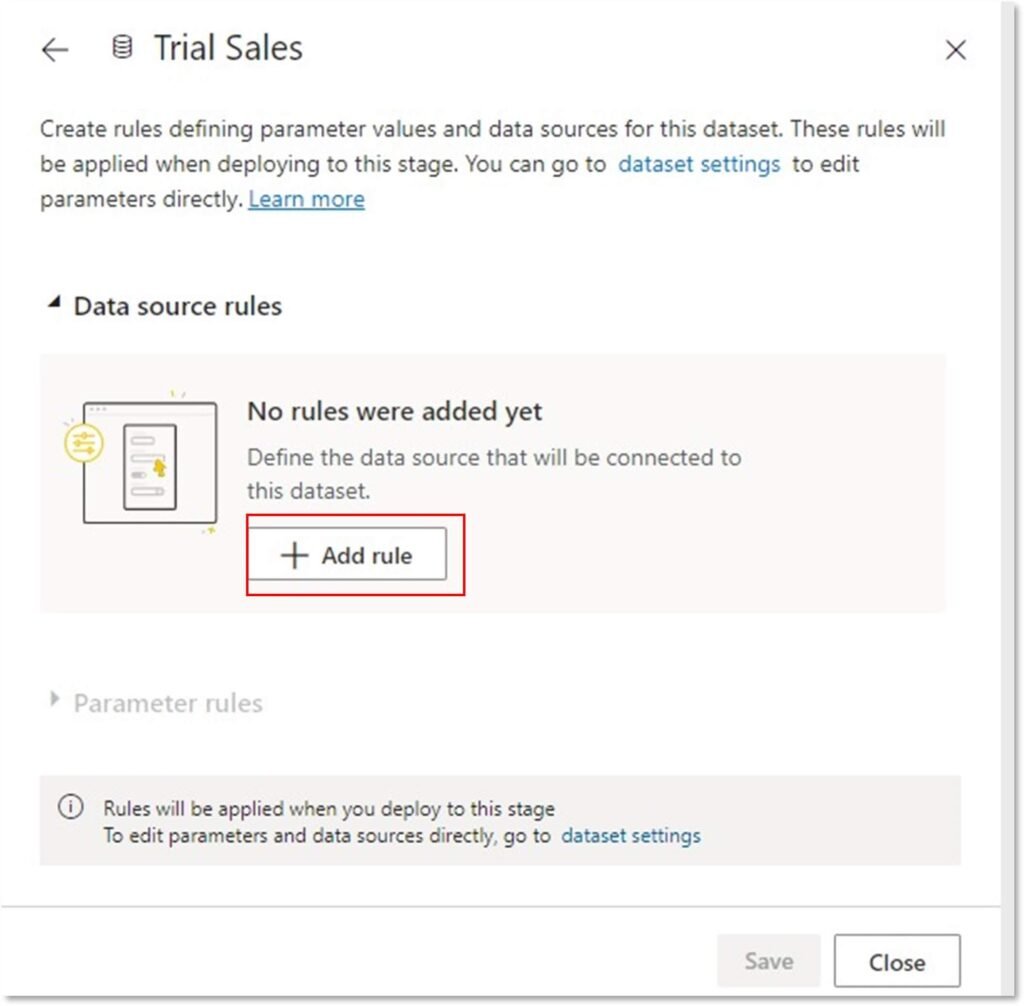
8. Deployment Datasets Rules- Dataset rules allow you to configure the specific parameters and data sources in a dataset. While working on pipelines, you can have different stages that may have different configurations. Each stage can have different databases or different parameters. When you deploy report content between pipeline stages, dataset rules enable you to allow changes to the content, while keeping some settings intact.
-To create deployment dataset rules, select ‘Deployment settings’. Click on the ‘lightning bolt’ button.

9. A pop-up will open, then select the dataset you want to create a rule for.
10. Now expand the data source rules list, and then select ’Add rule’.
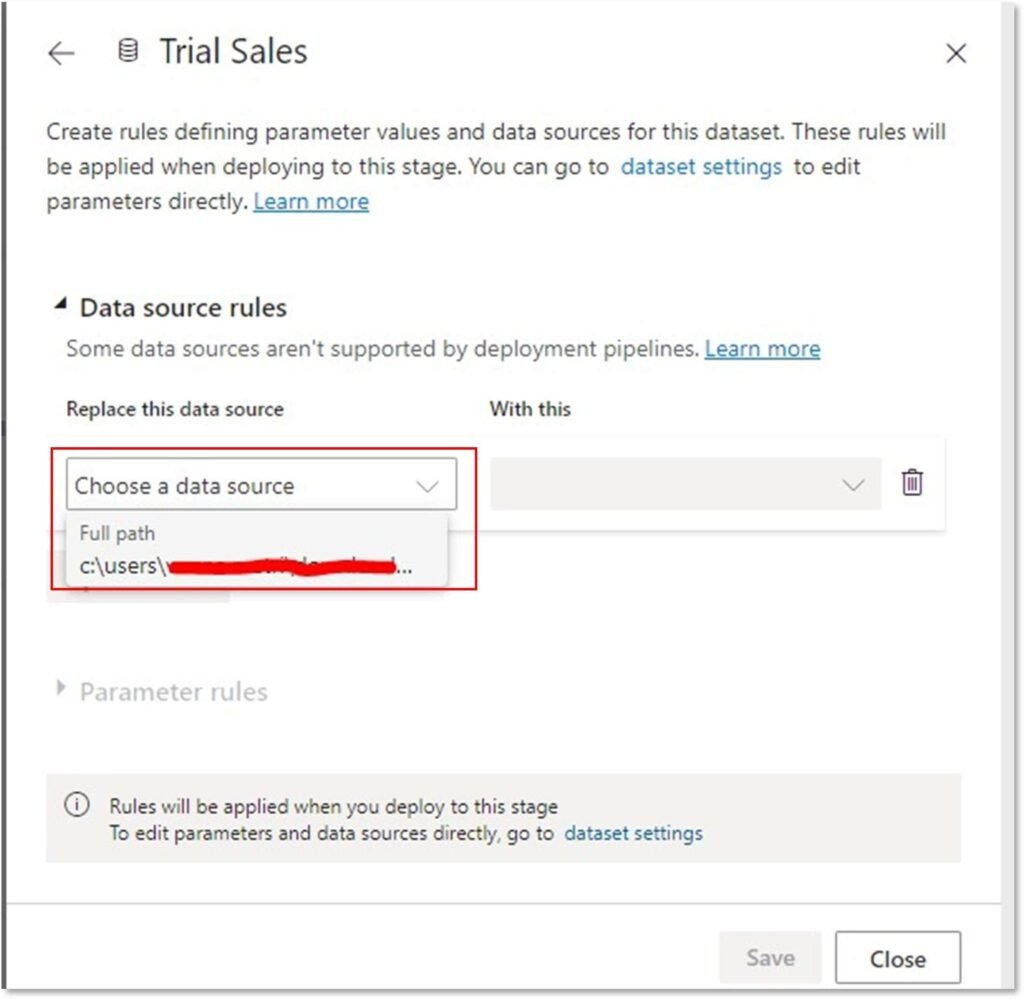
11. Now from the data source list, select a data source to be replaced.
*There are some dataset rules that need to be considered-
- You cannot create deployment dataset rules in the development stage.
- You must be a dataset owner to create a deployment rule.
- If the data source defined in a rule is changed/removed from the source dataset, the rule will not be valid, and the deployment will fail.
- You cannot define parameter rules for any or binary type of parameters.
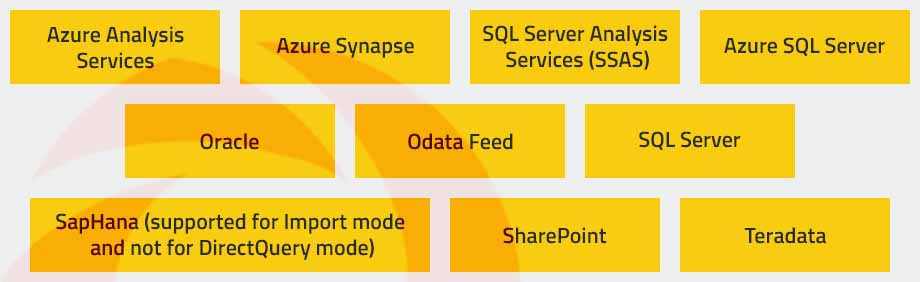
- You can define data source rules for the following data sources:
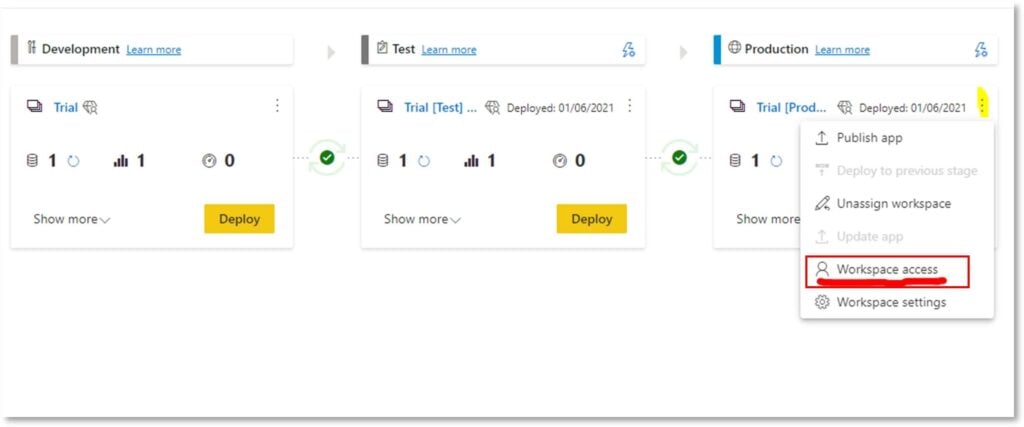
12. Pipeline Permissions- Select the right corner ellipsis to give workspace access to certain users. You can give the following permissions to the users –
- View the pipeline
- Share the pipeline with others
- Edit and delete the pipeline
Uses of Power BI Deployment Pipeline
Let us now look at the uses of Power BI deployment pipeline –
- You can create multiple Power BI deployment pipelines and share them with others.
- You can easily deploy content and copy it across Development, Test and Production environments.
- You can approve/deny the changes or updates made by others for the next deployment pipeline.
- You can configure the parameter and data source rules settings for each environment to keep the connections to the data.
- In pipeline permissions, you can limit the users in the production workspace to the bare minimum, while development and test can include more users.
There you have it! I hope with the help of my blog, you will be able to get started with deployment pipelines in Power BI. If you’d like to continue your exploration on a related note, read our blog to know how you can import data in real-time by using Power BI Hybrid tables. Visit us at Nitor Infotech or reach out to us if you have any queries or suggestions related to this topic.


